How to Create and Manage Workspaces in OrCAD X Capture CIS 24.1?
How To...
How can I create and manage a workspace in OrCAD X Capture CIS 24.1?
Answer
Starting with SPB 24.1, OrCAD X Capture CIS provides a collaborative development environment, where you can create a shared workspace containing work-in-progress components, designs, and library and project files. You can also manage access to your workspace; for example, you can share a workspace and provide users access rights on this shared workspace.
Creating a Workspace
To create a workspace, follow these steps:
- Start OrCAD Capture with one of the X licenses, like OrCAD X Standard/Professional/Professional Plus.
- Go to View > Workspace > Configuration. This opens the Workspace Configuration dialog box. Alternatively, right-click My Workspace and choose Workspace Configuration from the Component Explorer window (when a schematic page is active).
- To create a new workspace, in the Workspace Configuration dialog box, click New Workspace.
- This opens the Add Workspace dialog box. Here, specify a name for the workspace in the Name box.
- If the workspace is to be accessed by users outside the organization, select Provide access to users of external domains.
- If users are within the organization, select Selected users in organization.
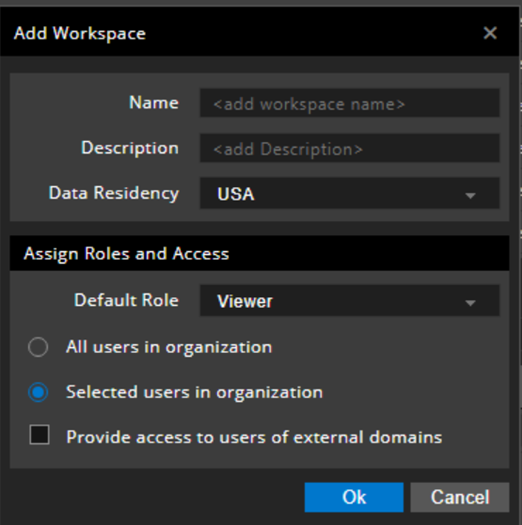
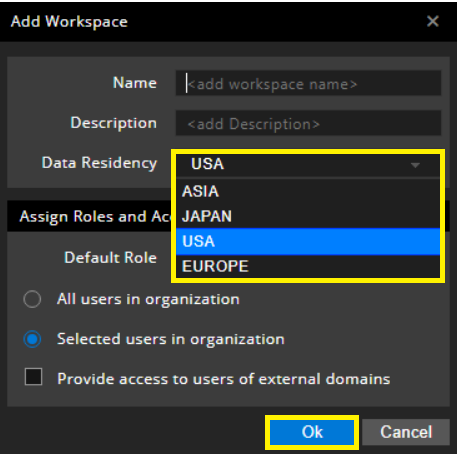
- Select the required option in the Data Residency box.
 Note:
Note:
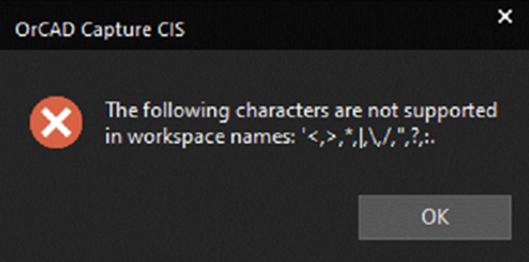
- The special characters are not supported in a workspace name (that is, in the Name box). The following message pops up if you put any unsupported character:
- User's local workspace is set from the Location or Country code specified during the time of registration. Once specified, data residency cannot be changed. This can be chosen when creating a new workspace.
- The special characters are not supported in a workspace name (that is, in the Name box). The following message pops up if you put any unsupported character:
- Click Ok.
- Once you create a workspace, right-click it and select Show/Hide from Component Explorer to show or hide the workspace in Component Explorer window.
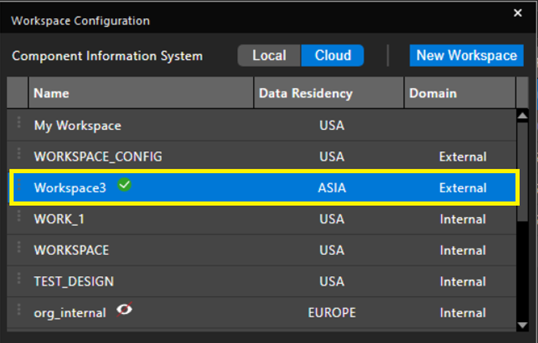
- You can further manage the workspace by making changes to it. You can also set any workspace as your default workspace by selecting Set as Default, as shown below:
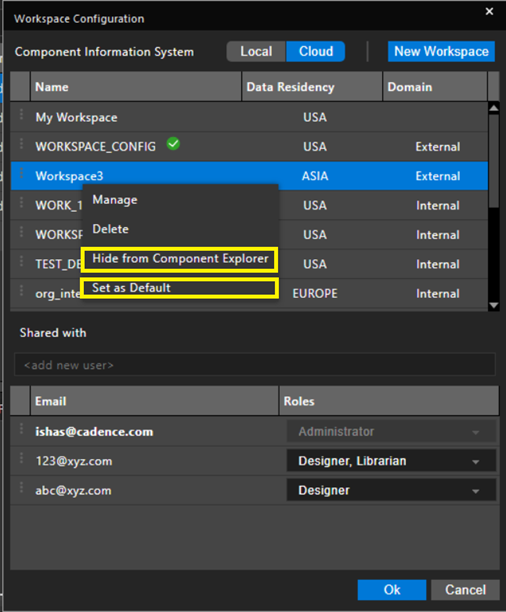
- My Workspace is the default workspace for all operations. The green tick icon next to the workspace name denotes the default workspace, as shown below:
- Click OK to save the configuration.
- The shared workspace appears in File Manager (accessed by selecting View > Workspace > File Manager) and in the Component Explorer window (accessed by selecting Place > Component).
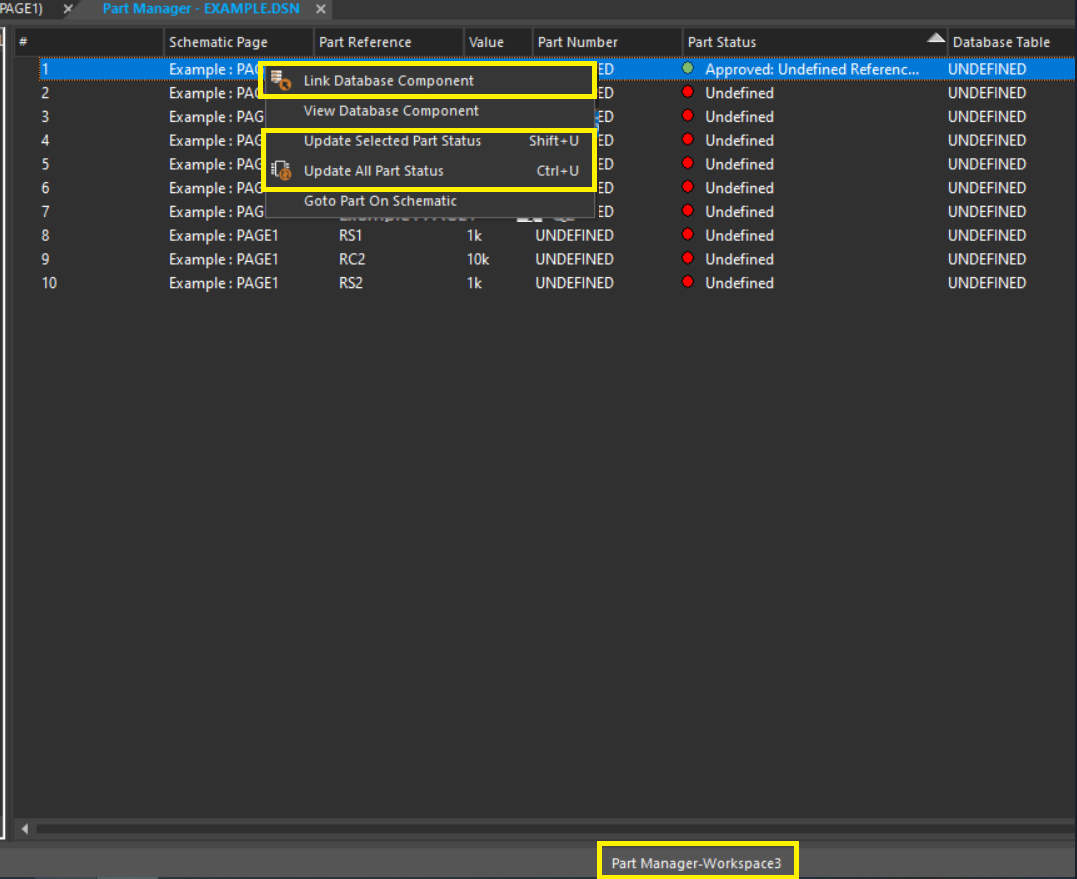
Note: When you use the Link Database Component or View Database Component command in Part Manager, the component is accessed from the default workspace database.
The Part Manager status bar displays the name of the default workspace as the data source; this is shown below:
Sharing a Workspace
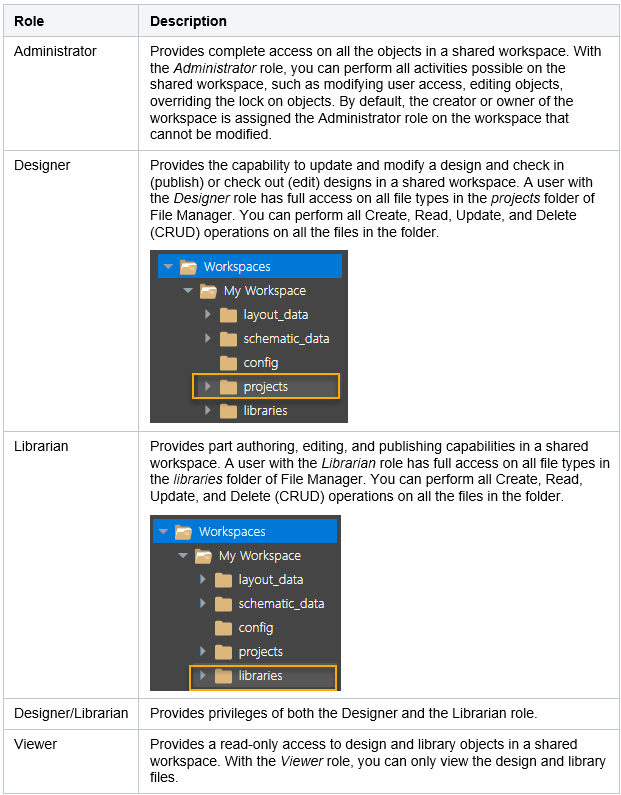
A workspace owner or Administrator can share a workspace by assigning access permissions to users. An Administrator adds users and assigns specific roles to them based on their work profile. Each role has associated privileges that are transferred to the user, who is assigned that role.
The following roles are supported in a shared workspace:
To share a workspace, follow these steps:
- Select the workspace you want to share in the Workspace Configuration dialog box.
- Under the Shared With section of the Workspace Configuration dialog box, specify user IDs of team members you want to share the workspace with, by specifying in the <add new user> box and press Enter.
- You can add new members to the workspace and provide access to the members on the workspace by assigning them roles with predefined access permissions.
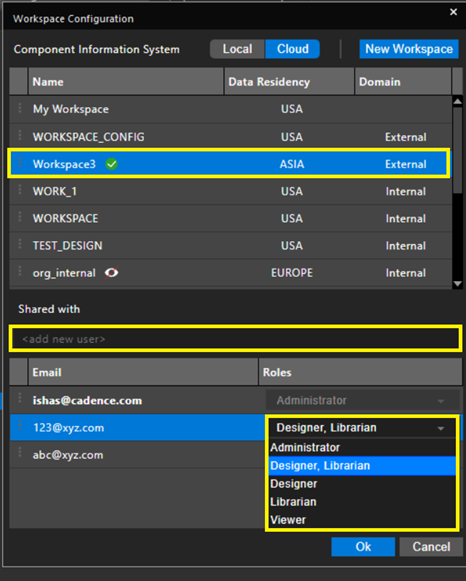
- A new member is assigned the most basic role (Viewer) by default. Also, note that the Administrator role has the highest level of access.
- Click Ok to share the workspace with specified roles.
Members can now view this workspace in the File Manager and Component Explorer interfaces.
Note: Any member with a non-Administrator role can view all the role details in the Workspace Configuration dialog box but cannot edit the roles because the check boxes are greyed out. Also, the owner of the workspace always appears greyed out, and no member with any role, including the Administrator role, can change the role or delete the owner from the workspace.