01 - Managing Part Libraries
Creating a Library
In Capture, you can create as many libraries as required by specifying a name and storage location for each library. Each library is available to each project. The library size is limited only by the amount of space on the system hard disk. However larger libraries take longer to load. If speed becomes an issue, you can create several smaller libraries.
Schematic folders and schematic pages cannot be created in a library, but can be copied or moved to a library from a project. Schematic folders and schematic pages can also be edited in a library.
When you create a new library, project manager adds an empty library to the project. To populate the library, you can create your own parts, or move or copy parts from another library.
To create a new library from project manager, do the following:
- Right-click the new library icon and save the new library with a file name and location of your choice.
- Populate the library by moving or copying files from other libraries. For more information, see Moving parts or symbols between libraries.
Alternatively, do one of the following:
- Choose File – New – Library.
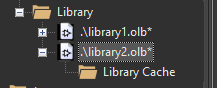
Capture adds a Library folder and a Library Cache folder to the project.
If you have an instance of project manager currently open at the time, Capture adds the library to the project. Otherwise, Capture creates a new project for the library.
You can create new parts and symbols in the library.
To rename a library, do the following:
- In project manager, select the library.
- Choose File – Save As.
- Specify a new name in the File Name text box.
- Click OK to return to project manager.
To specify the storage location for a library, do the following:
- In project manager, select the library.
- Choose the File – Save As menu command.
- Select the drive and directory in which you want to store the library.
- Click OK to return to project manager.
Editing a Library
- Copying a Part from the Design Cache to a Library
- Copying a Schematic Page to a Library
- Copying a Schematic Folder to or from a Library
- Moving Parts or Symbols between Libraries
- Behavior of Schematic Folders and Schematic Pages in Libraries
Copying a Part from the Design Cache to a Library
You can copy parts from the design cache to a library. This is useful if you have modified a part through the schematic page editor, and want a permanent copy of the part.
To save a design cache part in a library, do the following:
- In project manager, open the design cache, and select the part to save.
- Choose Edit – Copy.
- Open the library where you want to store the part.
- Choose Edit – Paste.
Alternatively, you can open two instances of project manager, one for the design and one for the library, and drag-and-drop the part from the design cache to the library.If you edit an OrCAD X-provided library, it is important to assign a new name to the library so that the changes you make are not overwritten when you upgrade or update the software.
Copying a Schematic Page to a Library
If you have a small circuit that is used in many projects, you can put the circuit on a separate schematic page, save it in a library, and attach it to a part that you can place in any design. It is recommended that you keep the attached schematic folder and the part in the same library.
Before editing a schematic page stored in a library, identify the projects that call the schematic folder. Editing a library-stored schematic folder may create problems for other projects that use the library-stored schematic folder.
To save a schematic page in a library, do the following:
- Move the page into a schematic folder.
When you save a schematic page in a library, Capture puts the parts of the circuit in the library cache.
A schematic folder or schematic page that is open in an editor cannot be moved or copied. - Verify that the page is not open in the schematic page editor.
- In project manager, create a schematic folder to store the page.
- Select the schematic page you want to save, and copy or move the page into the new schematic folder.
- Keep the new schematic folder selected.
- Choose the Edit – Copy menu command.
- Open project manager for the library in which you want to store the schematic folder.
- Choose Edit – Paste.
A schematic page that is opened in an editor cannot be moved or copied.
Alternatively, do the following steps after step 4.
- Drag and resize the project manager windows for the project and the library so that each is visible.
- In the project manager window for the project, select the schematic page you want to save, and copy or move the page into the new schematic folder. Keep the new schematic folder selected.
- Press and hold
Ctrlwhile you drag the schematic folder to the project manager window for the library.
If you copy or move a document from one design or library to another, save the destination design or library immediately. Else, you may lose data if you open the moved document in the schematic page editor or part editor and close the editor without saving the document.
Copying a Schematic Folder to or from a Library
To save a copy of a schematic folder as a library object, do the following:
- Verify that no part is opened in the schematic folder.
- In project manager, select the schematic folder to save.
- Choose Edit – Copy.
- Open the project manager window for the library in which you want to store the schematic folder.
- Select the library (.OLB) in the project manager window.
- Choose Edit – Paste.
Alternatively, open two project manager windows for the library and the design and drag-and-drop the schematic folder from the design to the library.
When using the drag-and-drop procedure, you need to keep the Ctrl key pressed. - Choose File – Save.
To copy a schematic folder from a library to a design, do the following:A schematic folder that is opened in an editor cannot be moved or copied.
- In project manager, open the library containing the schematic folder that you want to copy and select the schematic folder.
- Choose Edit – Copy.
- Open the project in which you want to store the schematic folder.
- Select the design (.DSN) in the project manager window.
- Choose Edit – Paste.
Alternatively, open two project manager windows for the design and the library and drag-and-drop the schematic folder from the library to the design.
When using the drag-and-drop procedure, keep the Ctrl key pressed. - Choose File – Save.
You can also attach a schematic folder to a part or hierarchical block without copying the schematic folder into the project or library, but this method affects design portability.
Moving Parts or Symbols between Libraries
You can store parts or symbols in any library. You can create libraries that serve a specific purpose. You can transfer some parts or symbols from one library to another and store some parts or symbols in multiple libraries. If you move a part with part alias from one library to another, the part alias is also moved to the library.
A part that is open in an editor cannot be moved or copied.
To move or copy parts between libraries, do the following:
- Verify that the parts are not open in the part editor or the spreadsheet editor.
- In project manager, select the parts to move.
- To move the part, choose Edit – Cut.
- To copy the part, choose Edit – Copy.
- In project manager window, select the library (.OLB).
- Choose Edit – Paste.
Alternatively, you can open two instances of project manager for the two libraries and drag-and-drop the parts between the libraries. To copy the parts, keep the Ctrl key pressed while you drag-and-drop the parts.
If you edit a library provided by OrCAD X, you need to assign a new library name, so that the changes are not overwritten when you upgrade or update the software.
To copy or create a part using an existing part, do the following:
- Follow the procedure for moving parts between libraries to create a copy of the part in another library.
- To move the new part created from an existing part to its original library:
- Use the Rename command and specify a different name for the part.
- Move the part to the original library using the steps explained earlier.
Behavior of Schematic Folders and Schematic Pages in Libraries
The behavior of schematic folders and schematic pages is almost identical in libraries and designs.
Some of the differences are as follows:
- Schematic folders and schematic pages cannot be created in libraries. If you want to add a schematic folder or a schematic page to a library, you must create it in a design and then move it to the library.
- Schematic folders and schematic pages are limited to the library tool set—updating properties, exporting properties, and importing properties.
- The Update Cache and Replace Cache commands are not available when parts are selected in the library cache.
- The Annotate command is unavailable for parts in schematic folders contained in libraries. Use the Annotate command in a schematic folder prior to moving it to a library.
- You can open a library-stored schematic page in a schematic page editor, and edit it exactly the same way as edit it from a design. However, it is recommended that you edit a schematic page in a design.
- If a schematic folder stored in a library is the child of another schematic folder in a design, the Descend Hierarchy command in the parent schematic folder opens the library containing the child schematic folder and a schematic page editor window containing the schematic page.
If you have a circuit that you use in many projects, you can put that circuit in a separate schematic folder, save it in a library, and attach it to a part that you can then place in any design. It is a good design practice to keep the part and the attached schematic folder in the same library. When you save a schematic folder in a library, Capture puts the parts in the circuit in the library cache.
Renaming a Library
To rename a library, do the following:
- In project manager, select the library (.OLB) file.
- Choose File – Save As.
The Save As dialog box displays. In this dialog, you specify an alternative name for the library. You can also specify an alternative directory location for the library. - Specify a name for the library and click OK.
While using the Save As dialog box to rename the library, do not specify a dot (.) in the library file name. Renaming a library in this manner breaks the links between the library and the parts selected from it, and the Update Cache command does not work. Such libraries also are not listed in the CAPTURE.INI file for configuration.
Saving a Library
The changes you make to a part are temporary until you save the part or the library. When you save a library, all the parts and symbols residing in the library are saved. If there are several parts or symbols opened in the part editor, the changes you make to any of them are saved. If the library is new and has not yet been saved, the Save As dialog box appears where you can specify a location and replace the system-generated name with a user-defined name.
- To save a library, choose the File – Save menu command in project manager.
The active library or the library that holds the active part is saved.
To save a library with a different file name, do the following:
- Open the project manager for the design or the library.
- Choose File – Save As.
- Specify a new file name in the File Name text box, and click OK.
For compatibility with future versions of Windows, Capture preserves the case of the path and filename as you specify them in the Library text box.
When you save a project, Capture automatically creates a backup with a .DBK file extension. When you save a library, a backup is created with a .OBK file extension. If you save only a schematic page or a part, no backup is generated.
- To close a library, choose File – Close in project manager.
View the next document: 02 - Using Part Libraries
If you have any questions or comments about the OrCAD X platform, click on the link below.
Contact Us