05 - Setting Up Layout Editor Design Environment
To create the board design efficiently, you first need to set up the design environment of OrCAD X Presto.
Adding Footprints and Padstacks Libraries
The tutorial design uses default OrCAD X libraries. You need to set the path to the footprints and padstacks libraries in OrCAD X Presto. To add the libraries, so the following:
- Choose Edit – Preferences.
The Preferences dialog boxopens. - Select the Directories & Paths folderunder Libraries.
- Make sure the following padstack library paths are set for.PSM.PAD and JSON:
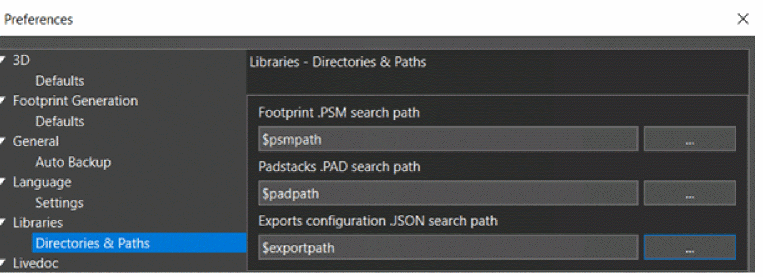
- Click OK to close the Preferences dialog box.
- Choose File – Save tutorial.brd to save the design.
- Click Yes if prompted to overwrite the design.
Modifying Default Design Outline
OrCAD X Presto creates a rectangular design outline, by default, when you create a new design. You can adjust the size of the design outline according to the size of your PCB by following these steps:
- In the Properties panel, ensure that Shapes is selected.
- Double-click the design outline shape.
The design outline shape is selected and the anchor points are visible.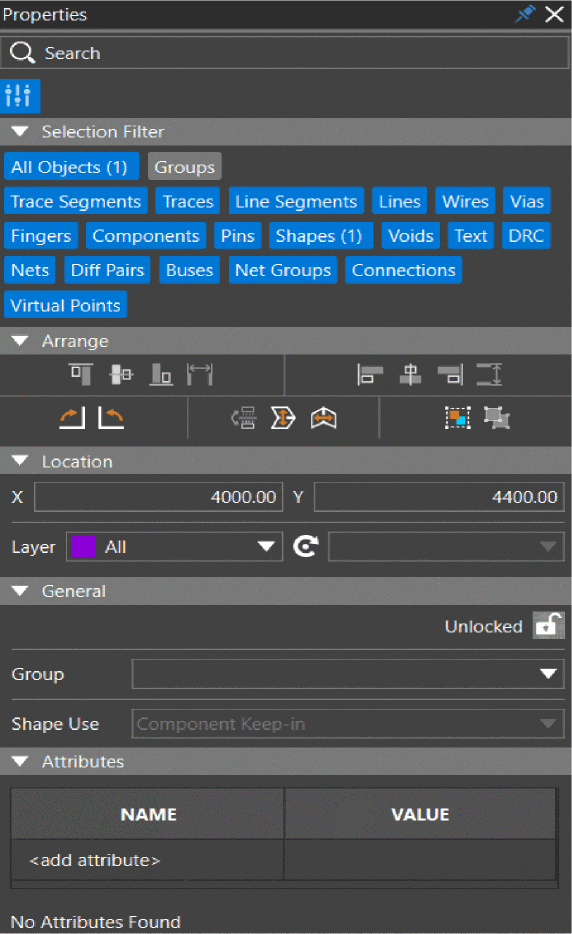
- In the General pane of the Properties panel, modify the Length X and Height Y of the design outline. Change the values to 4000 and 4400, respectively.
Alternatively, double-click an anchor point and drag the mouse to extend or shorten the selected edge of the design outline shape.
The length and height of the shape is updated in the General pane. -
Click anywhere in the blank space or press Esc.
To modify the shape of the design outline from rectangle to polygon, double-click a point on any edge. A new anchor point is added to the shape. Dragging the new anchor point creates a new vertex of the polygon-shapes design outline.
- To view the entire board in the design canvas, click the zoom fit icon
 from the functional toolbar.
Alternatively, choose View – Zoom – Zoom Fit to center the board outline in the design window.
- Choose File – Save tutorial.brd to save the design and click Yes to overwrite the file.
Setting Up Design Parameters
Drawing parameters for shapes and manufacturing process can be configured at the design level using the Design Settings dialog box. To modify the default design settings, perform the following steps:
- Choose Setup – Design Parameters Editor.
The Design Settings dialog box opens and displays the Shapes settings.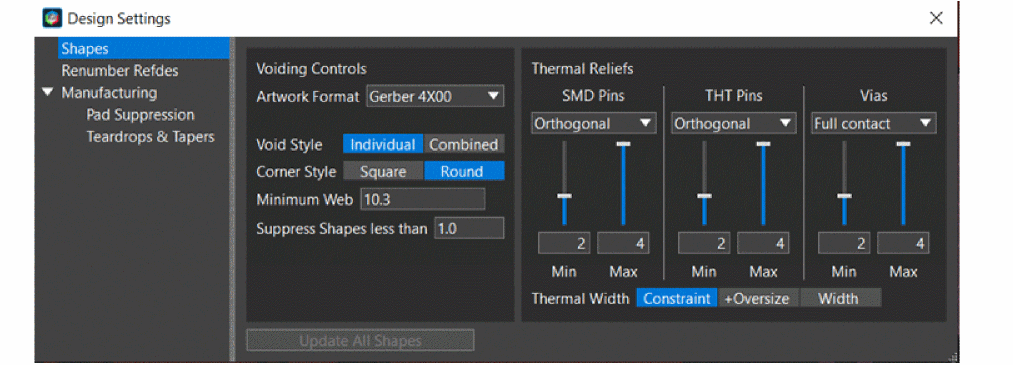
- In the Voiding Controls pane, ensure that Artwork Format is set to Gerber RS274X.
- In the Thermal Reliefs pane, ensure that Thermal Width is set to Constraint.
- Select Pad Suppression under Manufacturing in the tree view. Ensure that the Suppress Unused Pads option is set to Off.
Disabling this option ensures optimal routing and shape voiding.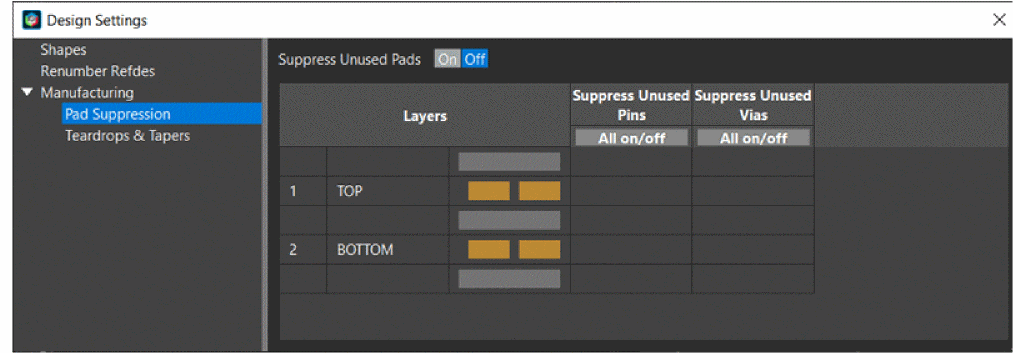
- Close the Design Settings dialog box.
Viewing Cross Section and Material Information
The tutorial design uses a single-layer PCB, which has copper on the BOTTOM layer and components on the TOP layer and uses default values for all parameters.
- Choose Tools – Cross Section to view the layer setup.
The Cross-section Editor window is displayed.
The conductor layers TOP and BOTTOM are for placing components. In the Cross-section Editor window, you can specify layer properties, such as material type, thickness, and so on.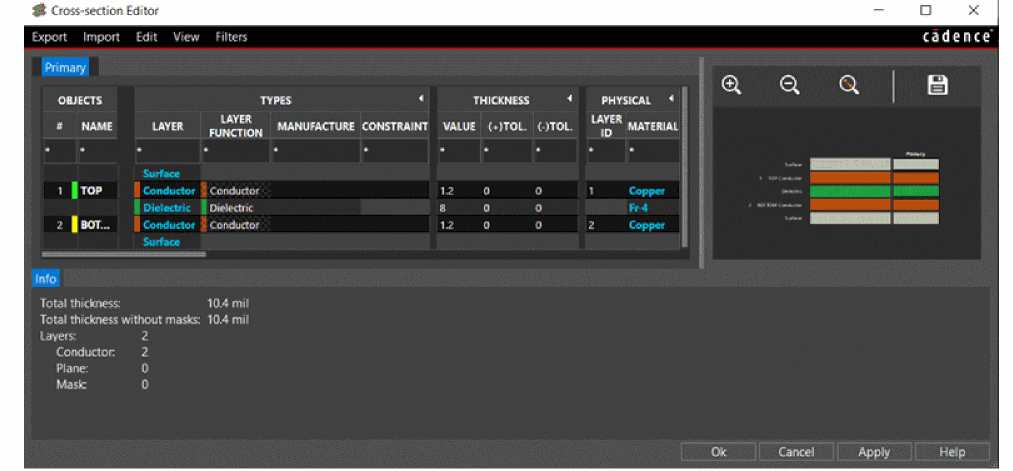
- Close the Cross-section Editor window.
- Choose Tools – Material Editor.
The Material Editor window opens and displays the list of materials available from the default library that is shipped with the installation.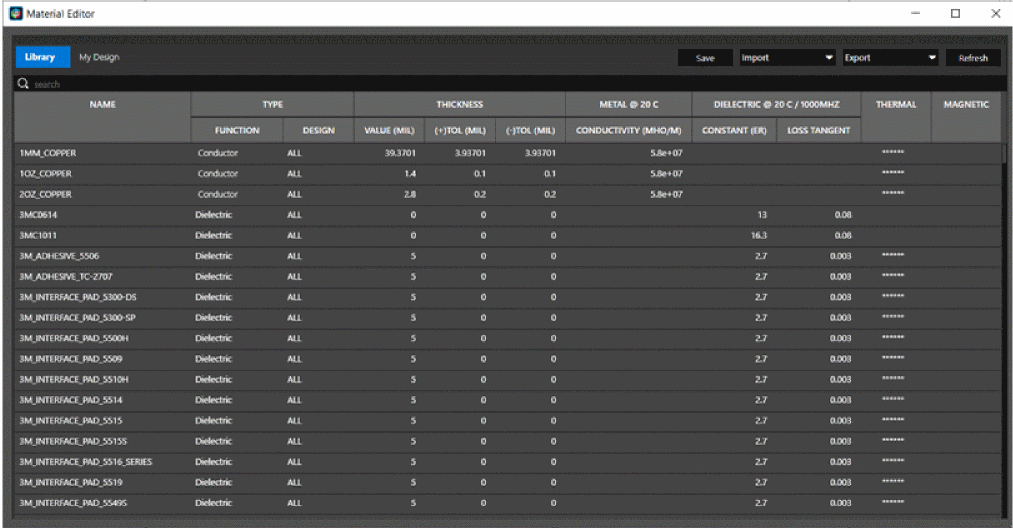
- Open My Design tab to view the materials used in the tutorial design.
- Close the Material Editor window.
Adding Artwork Views
To create artwork files, OrCAD X Presto reads film control records to determine the number of artwork files to produce, their names, and the list of classes and subclasses to include in each artwork file.
To add artwork view, do the following:
- Choose Manufacturing – Export to Manufacturing.
The Exports dialog box opens.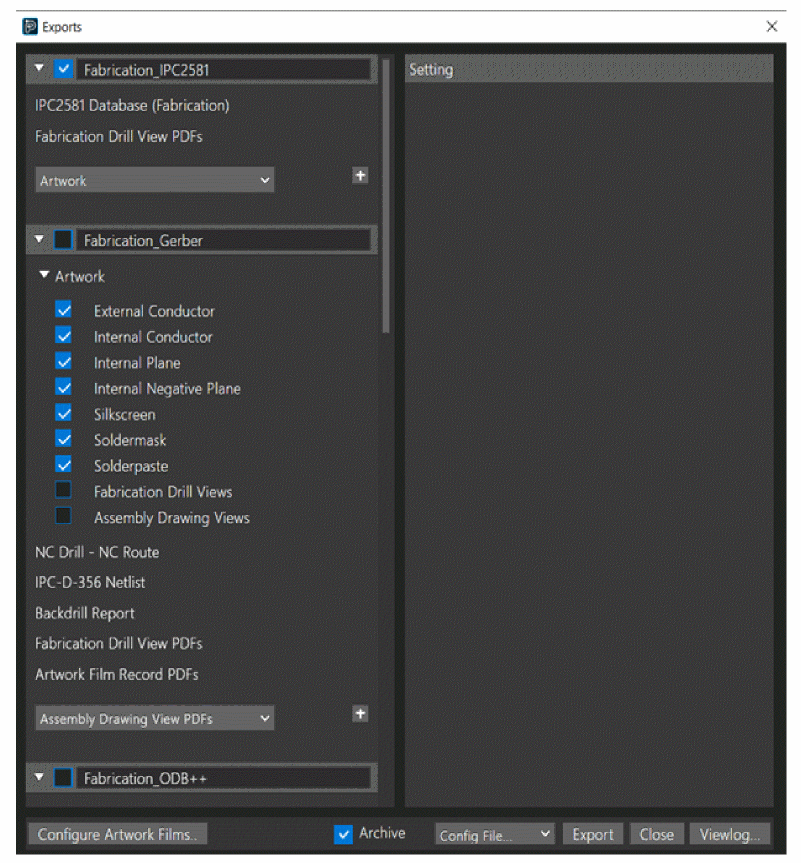
- Click the Configure Artwork Films option.
The Artwork Configuration dialog box opens with default settings.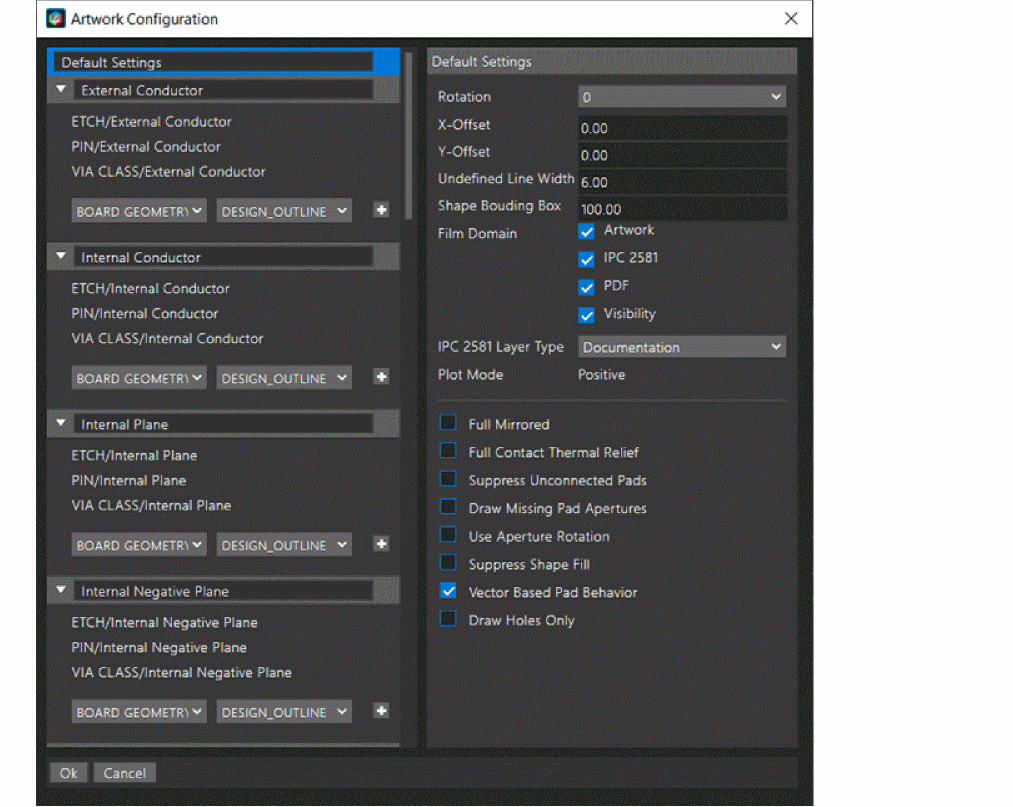
- In the Default Settings panel, deselect the check box for the Film Domain type PDF.
- Select the Suppress Unconnected Pads check box.
- Click OK to close the Artwork Configuration dialog box.
- Click Export in the Exports dialog box to generate artwork files.
- Close the Exports dialog box.
- Choose File – Save tutorial.brd to save the design.
Summary
This section covered the tasks for setting up the OrCAD X Presto environment for creating a board design, quickly and efficiently.
View the next document: 06 - Placing Components Interactively
If you have any questions or comments about the OrCAD X platform, click on the link below.
Contact Us