06 - Placing Components Interactively
Component placement is an important task in PCB designing to facilitate easy routing and optimal electrical performance.
Setting Grid for Placement
To ease the process of component placement, enable the placement grid by following these steps:
- Click the #Grids tab from the upper-left corner of the design canvas to display the Grids pane.
- Click the On buttonto enable the visibility of the grids.
- Choose the grid value 25/100 in the Mils section.
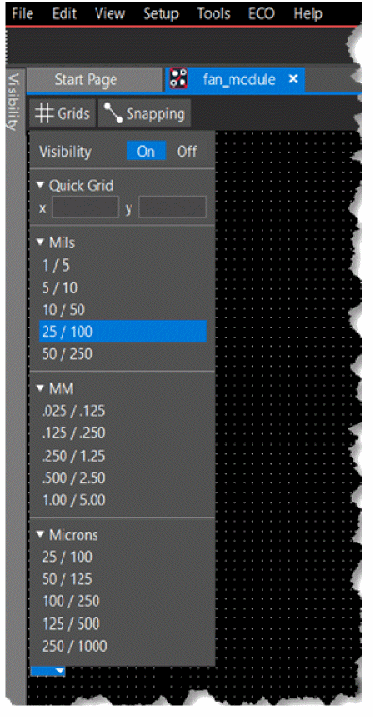
When placing components, the origin of the package symbol snaps to this grid. - To hide the Grids pane, click anywhere in the blank space.
Placing Components
OrCAD X Presto provides interactive commands to place components quickly and efficiently in a design.
- Choose ECO – Quickplace Components to place all the components in the design canvas in a single step.
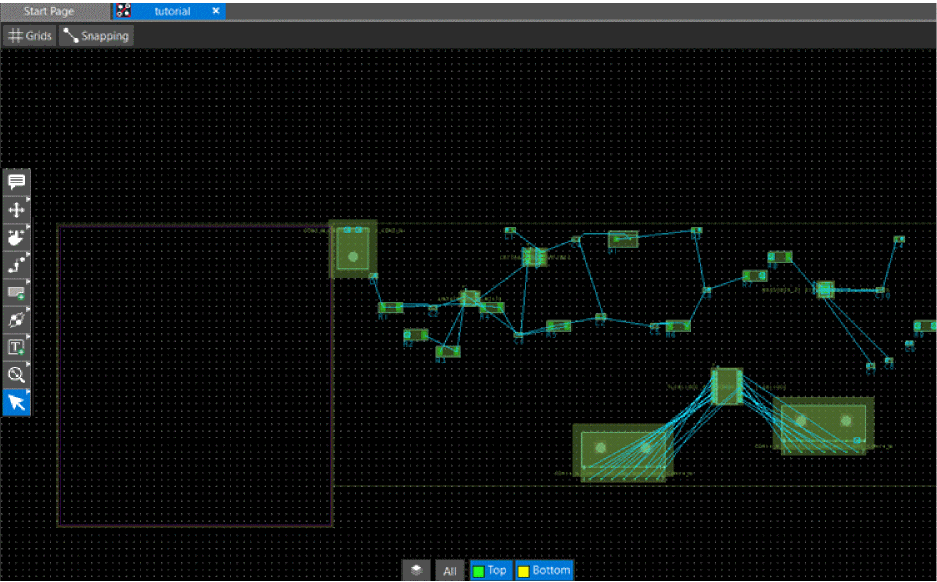 All the components are placed along the longest edge of the design outline shape. Rats are displayed between pins of the same net and help you place components that are connected close to each other.
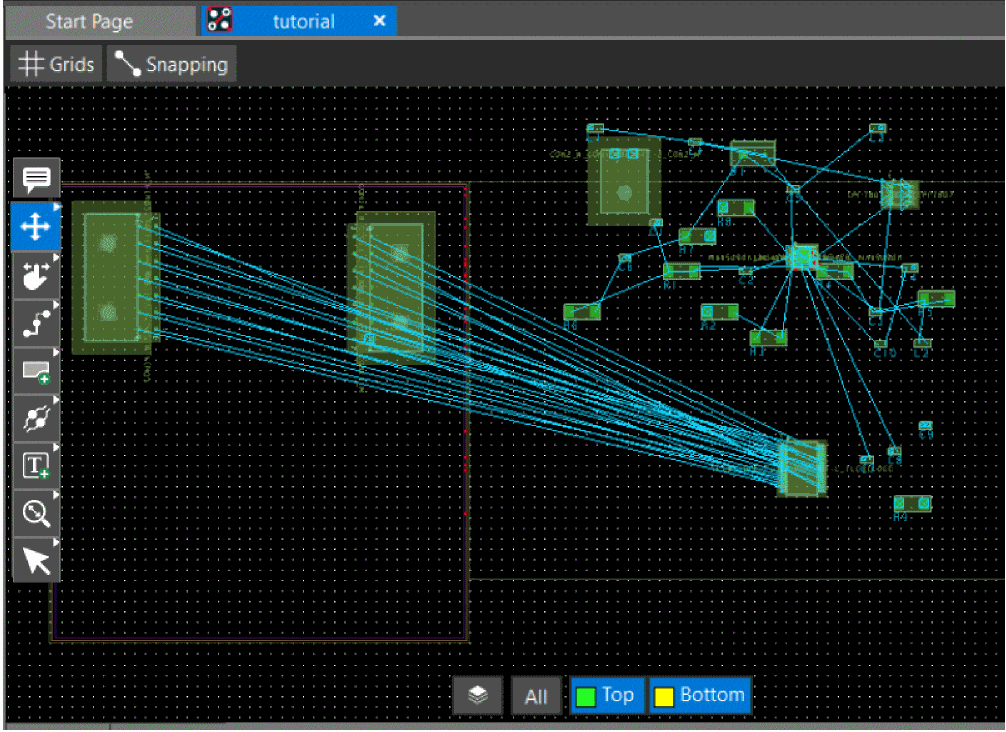
 - Click the Move icon
 from the functional toolbar and click the J3 symbol to move it inside the design outline.
The symbol gets attached to the cursor. - Move the cursor near the left boundary of the outline.
- In the Arrange pane of the Properties panel, click the Rotate Left button to rotate the symbol by 90 degrees anti-clockwise.
- Click to place the symbol J3 in the design canvas.
The move command remains active until you press the Esc button.
- Select the J2 symbol, click the Rotate Right button in the Arrange pane of the Properties panel and place it along the right boundary of the design outline as shown in the following image:
To delete a component from the design canvas, right-click the symbol and choose Delete or use the Delete key.
- Similarly, select each symbol to place all the component symbols inside the design outline. The following image depicts a sample placed board:
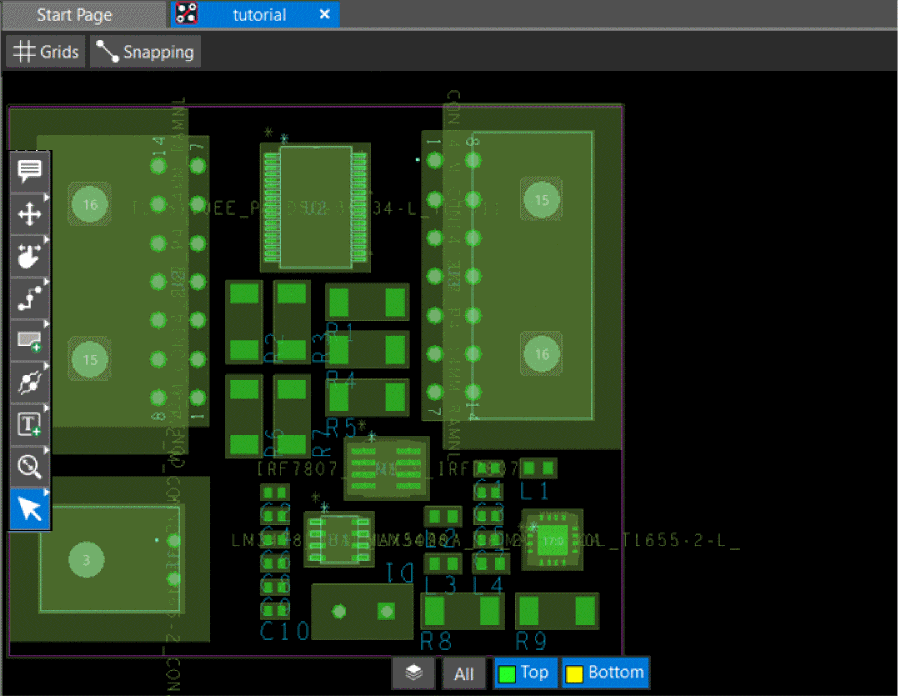
- To verify that all the components are placed, check the Status pane for Unplaced Components in the Properties panel.
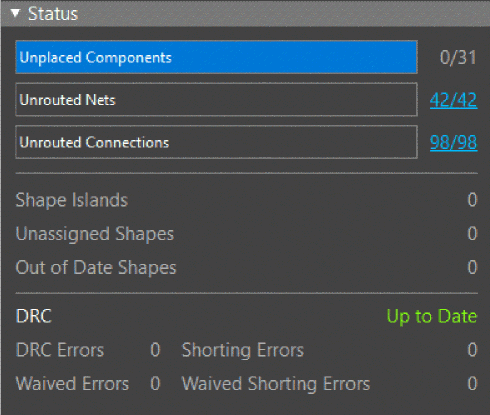
The Status section indicates that there are 0 Unplaced Components. - Choose File – Save tutorial.brd to save the design.
Summary
This section introduced the methods to place components in OrCAD X Presto.
View the next document: 07 - Routing Nets Interactively
If you have any questions or comments about the OrCAD X platform, click on the link below.
Contact Us