How to Open OrCAD X and Setup Your Project
Key Takeaways
-
Learn how to launch OrCAD X and manage user permissions.
-
Open, create, and configure new or existing OrCAD X projects.
-
Adjust admin settings, including licensing and library paths.
OrCAD X is a powerful tool for PCB design and circuit simulation and is widely used by engineers and designers. Whether you're starting a new project or resuming an existing one, this guide will walk you through how to open OrCAD X and configure settings to ensure it’s ready for use.
Quick Summary: How to Open OrCAD and Prepare for Use
|
Step |
Details |
|
Launching OrCAD X |
Open OrCAD X from the Start menu or with a desktop shortcut. If permission issues arise, run as administrator. |
|
Opening a Project |
Use File > Open to load existing projects (.opj for schematics, .brd for PCB layout). |
|
Creating a New Project |
Select File > New > Project, choose a template (schematic, PCB, or library), and set a save location. |
|
Managing Schematic Pages |
Open or close multiple schematic pages in the Project Manager for easier navigation. |
|
Setting Up Licensing |
Use the Cadence License Manager to check server connections and validate licenses. |
|
Configuring Library Paths |
Under Options > Preferences, add paths to component libraries (.olb files) for easy access. |
|
Adjusting Grid & Display |
Modify grid size, colors, and zoom settings under Options > Preferences for better visibility. |
Launching OrCAD X
-
On Windows:
-
-
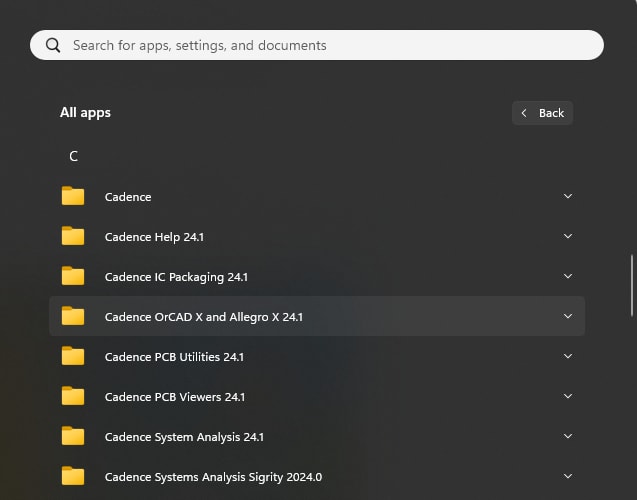
Click the Start menu and navigate to the Cadence folder (or the version-specific folder, e.g., Cadence 24.1).
-
Depending on your license, for example in version 24.1, you will click on the Cadence OrCAD X and Allegro X folder.
-
Select Capture CIS 24.1 for schematic capture or for PCB layout you can select PCB Editor 24.1 or OrCAD X PCB Presto 24.1, respectively.
-
Alternatively, double-click the application’s desktop shortcut if available.
-
-
User Permissions:
-
If you encounter permission errors, right-click the OrCAD X application icon and select Run as administrator.
-
Opening an OrCAD X Project
-
New Project:
-
-
Go to File > New > Project.
-
Choose a template (e.g., Schematic, PCB, or Library).
-
Name your project and select a save location.
-
-
Existing Project:
-
-
Navigate to File > Open > Project.
-
Browse to your project’s .opj file (for schematic capture) or .brd file (for PCB layout) and click Open.
-
-
Exiting the Project
-
Close via Project Manager: Click the X on the Project Manager window.
-
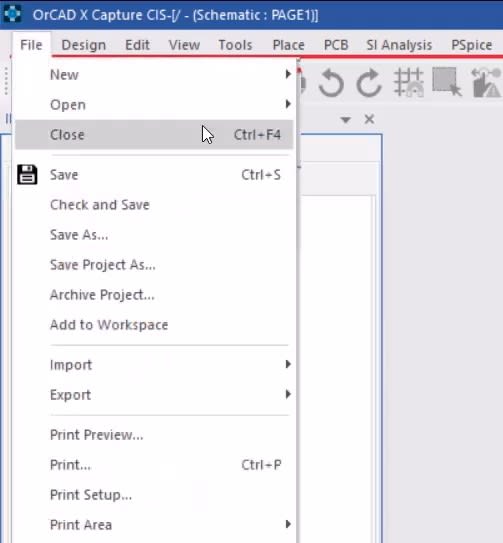
Use the File Menu: Navigate to File > Close to exit the current project.
Exiting the Application
-
-
To fully close OrCAD X Capture, select File > Exit or click the close button on the main window.
-
Managing Schematic Pages in the Project Manager
Exploring the Project Manager Window
-
The Project Manager includes:
-
Schematic Folders: Organize your design pages.
-
Design Cache: Stores library parts used in the design.
-
Outputs Folder: Contains reports (e.g., Bill of Materials).
-
Opening and Closing Schematic Pages
-
Open Individual Pages: Double-click any schematic page (e.g., Page 1 or Page 2) to view it in a tabbed window.
-
Close All Tabs: Right-click a schematic tab and select Close All Tabs.
-
Open Multiple Pages at Once:
-
Select multiple pages under the schematic folder.
-
Right-click and choose Edit Page to open them all.
-
How to Open OrCAD X with Admin Configurations
Before diving into design, configure these critical settings:
A. License Setup
-
OrCAD X requires a valid license. If the software fails to launch:
-
Open Cadence License Manager (Start menu > Cadence > License Manager).
-
Ensure your license file (.dat) is correctly pointed to the license server or local path.
-
Restart the license service if updates were made.
-
-
Go to Options > Preferences in OrCAD X Capture.
-
Under the Library tab, add paths to your component libraries (.olb files).
-
Save the configuration to avoid re-adding paths for future projects.
C. Environment Variables
-
Set system variables for global settings (e.g., default directories):
-
Navigate to Setup > User Preferences.
-
Adjust variables like HOME (for user files) or TEMP (for temporary files).
-
D. Grid and Display Settings
-
Customize your workspace under Options > Preferences:
-
Adjust grid size, colors, and zoom settings for better visibility.
-
Troubleshooting Common Issues
-
License Errors: Verify license server connectivity or renew expired licenses.
-
Missing Libraries: Recheck library paths and file integrity.
-
Access Denied: Run OrCAD X as admin or contact your IT team for permissions.
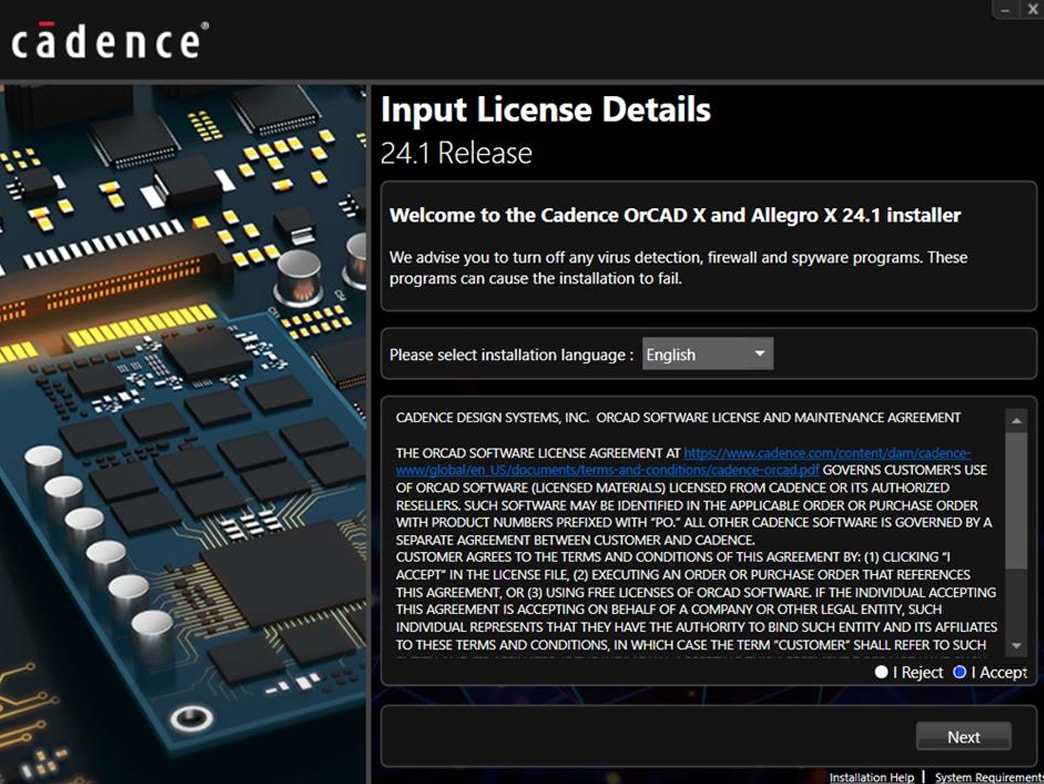
License agreement window.
Configuring and Managing the Cadence License Manager
This section provides additional support regarding the license manager, and the license configuration utility. If you run into any issue after these instructions, contact support.
Downloading the Latest License Manager
-
Visit the official Cadence downloads portal: https://downloads.cadence.com.
-
Search for Lic+Config_Utils, the release name for the License Manager installation package.
-
Download and install the utility to set up the latest version of the Cadence License Manager.
Configuring the License Manager
-
Launch the Utility:
-
Go to the Start Menu > Cadence – Release <version> > License Client Configuration Utility.
-
-
Specify License Servers:
-
Enter the port number and hostname of your license server(s) in the format port@hostname (e.g., 5280@sjlic01).
-
For multiple servers, separate entries with a semicolon (;):
-
-
Example: 5280@host1;5280@host2
-
-
-
For fault-tolerant or triad configurations, use commas (,):
-
-
Example: 5280@host1,5280@host2,5280@host3
-
-
-
-
Save Settings: Click Next to finalize the configuration.
Managing Licenses with the License Server Configuration Utility
When to Use the Utility
Use this tool to:
-
Apply a replacement license file (e.g., expiring licenses or additional product licenses).
-
Configure a new license server without reinstalling the License Manager.
Launching the Utility
-
Navigate to Start Menu > Cadence > License Manager > License Server Configuration Utility.
Applying New or Replacement Licenses
-
Replace an Existing License:
-
Upload the new license file provided by Cadence.
-
Follow prompts to update the server configuration.
Configure a New License Server:
-
Input the license file details to set up a fresh server instance.
Now that you know how to open OrCAD X, take the next step in your PCB design workflow. Whether configuring licenses, setting up libraries, or troubleshooting startup issues, OrCAD X provides powerful tools to streamline your process. Explore more on our PCB Design and Analysis Software page and the OrCAD X platform.
Leading electronics providers rely on Cadence products to optimize power, space, and energy needs for a wide variety of market applications. To learn more about our innovative solutions, talk to our team of experts or subscribe to our YouTube channel.