Workspace Configuration and Project Management in OrCAD X Design Environment
Key Takeaways
-
Learn how to create, configure, and manage workspaces in OrCAD X, supporting local and cloud-based collaboration.
-
Assign roles with specific permissions in shared workspaces, enhancing team collaboration and resource management.
-
Simplify project management with tools for new project setup, file organization, and document management in OrCAD X Capture.
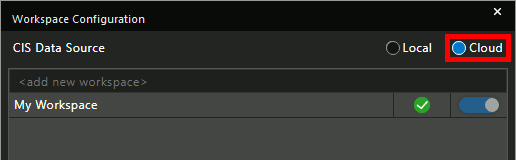
View > Workspace > Configuration, opens the workspace window.
The OrCAD X design environment provides a comprehensive PCB design platform that offers a rich set of features to streamline your entire electronic design process and take your designs from concept to production. This guide provides a step-by-step approach to help you navigate the OrCAD X design environment effectively.
To begin using OrCAD X, sign in with your Cadence account credentials. If you don't have an account, you can create one during the installation process. After launching OrCAD X, you'll be prompted to enter your username and password. This authentication ensures access to all features and any cloud-based services associated with your account.
Workspace Alignment in OrCAD X Design Environment
Configuring your workspace in OrCAD X is essential for organizing your project environment and ensuring easy access to files, libraries, and collaboration tools. This process allows you to create a workspace, connect it to local or cloud storage, and add team members for shared access, making it easier to collaborate on designs.
Creating a Workspace and Setting Up Cloud Collaboration
-
Open the Design File:
Begin by opening the design file you want to work on in OrCAD X Capture CIS. Launch OrCAD X Capture CIS with an OrCAD X Professional license, as this version enables team-based workspaces for shared file and library access. If prompted, log in using your Cadence credentials. -
Activating the Workspace Configuration Window:
Go to View > Workspace > Configuration in the menu bar to access the workspace settings. This will open the Workspace Configuration window, where you can set up your workspace. -
Selecting a Data Source:
In the Workspace Configuration window, select either Cloud (for cloud-based collaboration) or Local (for working with an existing local database). Selecting “Cloud” enables file sharing and synchronization, which benefits teams working remotely or collaboratively on shared designs. -
Creating a New Workspace:
To create a new workspace, enter a name in the Add New Workspace text field and press Enter. This step establishes a dedicated space for managing shared files and libraries.
Adding Team Members to the Workspace
Once the workspace is created, your Cadence profile is automatically added to the Members list. To add other users, enter each team member’s Cadence username (matching their Cadence email) and press Enter. Users can be assigned roles with specific permissions: Admin (full access), Designer (design modification), Librarian (library management), and User (read-only). The workspace creator is automatically given the Admin role to manage configurations fully.
Setting a Default Workspace
After adding users and configuring roles, right-click the new workspace (e.g., “Engineering”) and select Set as Default. The green checkbox will move from “My Workspace” to the new workspace, marking it as the default environment. This designation streamlines access and ensures that all new projects or documents are saved in the designated workspace by default.
Finalizing and Saving the Workspace Configuration
Once all settings are configured, click OK to save your workspace setup. This completes the configuration, enabling you to use the workspace for efficient, cloud-based collaboration. With the workspace now accessible to your team, you can easily share libraries and design files, ensuring everyone has up-to-date access to essential resources.
By setting up and aligning your workspace, you establish a structured environment for project management and enable seamless collaboration within OrCAD X, whether working with local or cloud resources.
Creating and Opening Projects / Documents
Creating and managing projects in OrCAD X design environment is a straightforward process that facilitates efficient schematic design and documentation. Here's how to get started:
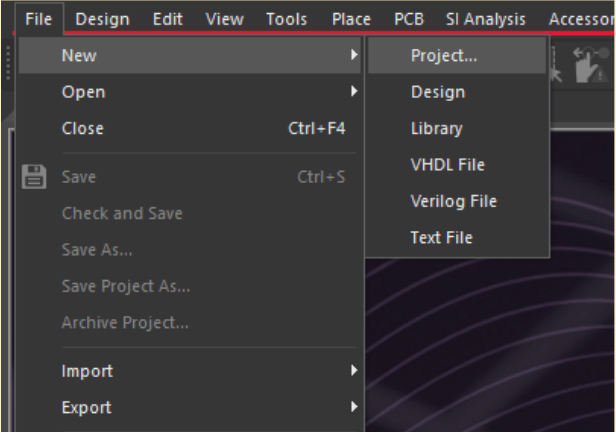
File > New > Project to create a new OrCAD X project
Creating a New Project
-
Launch OrCAD X Capture: Open the application from your Start menu or desktop shortcut.
-
Initiate a New Project:
-
Navigate to File > New > Project from the menu bar.
-
In the dialog box, enter a project name.
-
Click the ellipsis (...) to choose a save location for your project files.
-
Click OK to create the project.
This process creates a new project directory with the necessary subfolders and files.
Opening an Existing Project
-
Access the Open Project Dialog:
-
Select File > Open > Project from the menu.
Locate and Open the Project:
-
Browse to the directory containing your existing project files.
-
Select the desired project file (with a .dsn extension).
-
Click Open to load the project into OrCAD X Capture.
This allows you to resume work on previously created designs seamlessly.
Managing Project Documents
Within your project, you can create and manage various documents:
-
Adding a New Schematic Page:
-
Right-click on the project name in the Project Manager panel.
-
Select New > Schematic Page.
-
Assign a name to the schematic page and click OK.
-
Saving Your Work:
-
Regularly save your project by selecting File > Save or pressing Ctrl+S.
Navigation and Document Management
Efficient navigation and document management are important for productivity:
-
Project Manager:
-
Access all project files and documents.
-
Organize files into folders for better management.
-
Design Navigation:
-
Use the Navigator panel to move between different design sheets or PCB layers.
-
Document Management:
-
Save documents regularly using File > Save or Ctrl+S.
-
Utilize version control features to track changes.
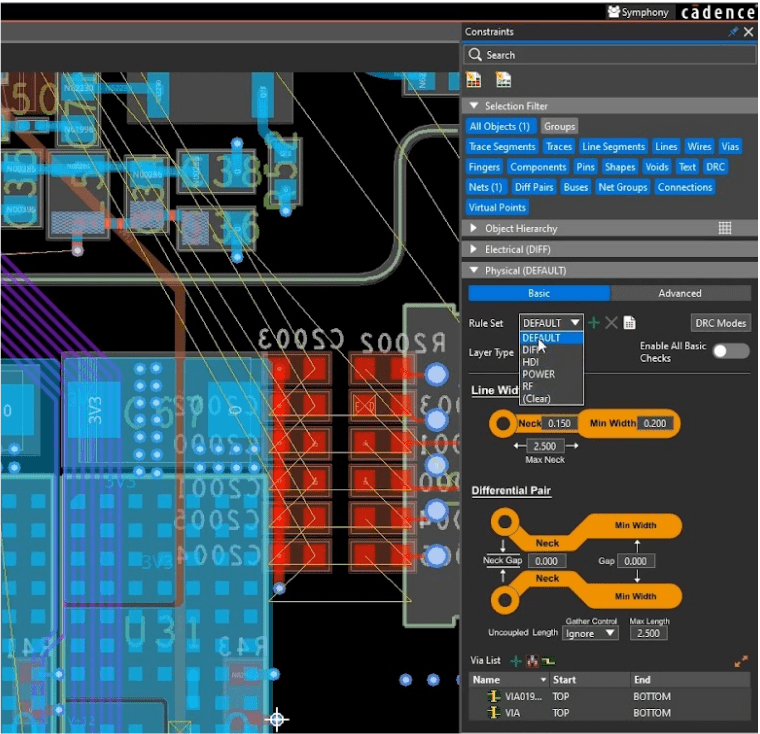
New in OrCAD X is the docked constraint panel.
Managing and Changing the UI
Customizing the user interface (UI) in the OrCAD X design environment enhances your design efficiency by tailoring the workspace to your preferences. Here's how to manage and modify the UI:
Customizing Toolbars and Panels
-
Docking and Arranging Panels: Drag panels to desired locations; they will snap into place, allowing you to organize tools and information effectively.
-
Resizing Windows: Hover over window edges to adjust their size, providing optimal visibility for your design elements.
-
Saving Workspace Layouts: Once satisfied with the arrangement, save the layout via View > Workspace > Save Workspace. This ensures your customized setup is preserved for future sessions.
Modifying Display Settings
-
Grid Display: To enable or disable the grid, go to View > Grid. Adjusting the grid aids in precise component placement.
-
Units of Measurement: Change units by selecting Options > Preferences > Design Template, then choose between mils or millimeters. This setting ensures consistency with your design requirements.
Setting Default Preferences
To establish default settings for new projects:
-
Access Preferences: Navigate to Options > Preferences.
-
Configure Defaults: Adjust settings such as default font sizes, colors, and other design parameters to align with your workflow.
Following these guidelines, you can effectively navigate and utilize the OrCAD X Design Environment, setting a solid foundation for your PCB design projects.
With a well-configured OrCAD X design environment, PCB designers can streamline project workflows, collaborate seamlessly, and enhance design precision—all essential for today’s complex electronic design needs. Cadence’s PCB Design and Analysis Software suite provides a comprehensive set of tools for every stage of the design process, empowering designers to take their concepts to production smoothly and efficiently. Explore more about PCB Design and Analysis Software and see how OrCAD X can transform your design environment today.
Leading electronics providers rely on Cadence products to optimize power, space, and energy needs for a wide variety of market applications. To learn more about our innovative solutions, talk to our team of experts or subscribe to our YouTube channel.