04 - Managing Design Objects
This section explains the changes that you will observe while using schematic design objects and related operations.
- Working with Schematic Objects and Operations
- Finding Constraints
- Cross-Probing of Design Objects
- Renaming Nets
- Modifying Voltage for Nets
Working with Schematic Objects and Operations
Following is the list of changes you will observe when you enable Constraint Manager and use the Capture-Constraint Manager flow:
- Property Editing
All constraints and constraint-related properties for net objects are managed in Constraint Manager only.
The component properties for parts and pins are to be managed only from Property Editor in Capture.
- Assigning Voltage
You need to assign voltage to power nets. You can also set this function on auto-assign mode for all subsequent designs being opened and enabled for Constraint Manager in the same session.
- Handling Buses and Net Groups
Buses and net groups if created in the Capture schematic are not recognized as bus or net groups in the Constraint Manager user interface. These appear as individual nets.
Buses and net groups (if any) available in the layout editor and in Constraint Manager invoked from the layout editor are available in the Constraint Manager user interface for a Constraint Manager-enabled design.
- In a non-Constraint Manager-enabled design, the PCB netlist files are created as pst*.dat files. In a Constraint Manager-enabled design, these files appear as zipped files (*.cdsz) in the project folder.
- If you copy the schematic design from a Constraint Manager-enabled project to a new design, the constraints are not copied.
- After enabling Constraint Manger in Capture, the following menu options are disabled in Capture. Their corresponding functions are now done only in Constraint Manager:
- All menu options related to Electrical CSets
- View XNet Signals
- Create Differential Pair
Note: In the legacy design mode, the above-listed operations work in Capture.
- The undo operation is limited to schematic operations only. The undo operation will not undo any constraint-related operation.
Here is an example that suggests the changes you will observe in the undo operation.
Pin Pairs after Replacing or Deleting Parts
If a pin-pair is associated with a net and you delete or replace the component attached to it, the pin-pair definition disappears.
If you delete the component and perform the undo operation, the component is added to the design but the associated pin-pairs are removed from Constraint Manager and need to be added again.

Finding Constraints
You can use the Search functionality to find transferred constraints. To do so:
- Select Edit – Find or press
CTRL+F. <>The Find pane opens.
Observe the various parameters, such as constraint categories, using which you can filter the search results.
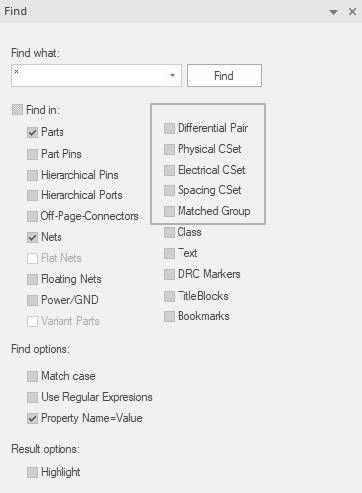
- Select the required constraints.
- Specify the search string in the search text box.
- Click the Find button.
The Find Results window opens displaying the search results. - Click the required constraint category.
For example, click Electrical CSet.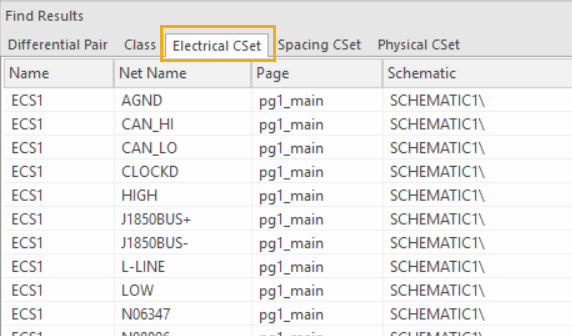
- Double-click a constraint.
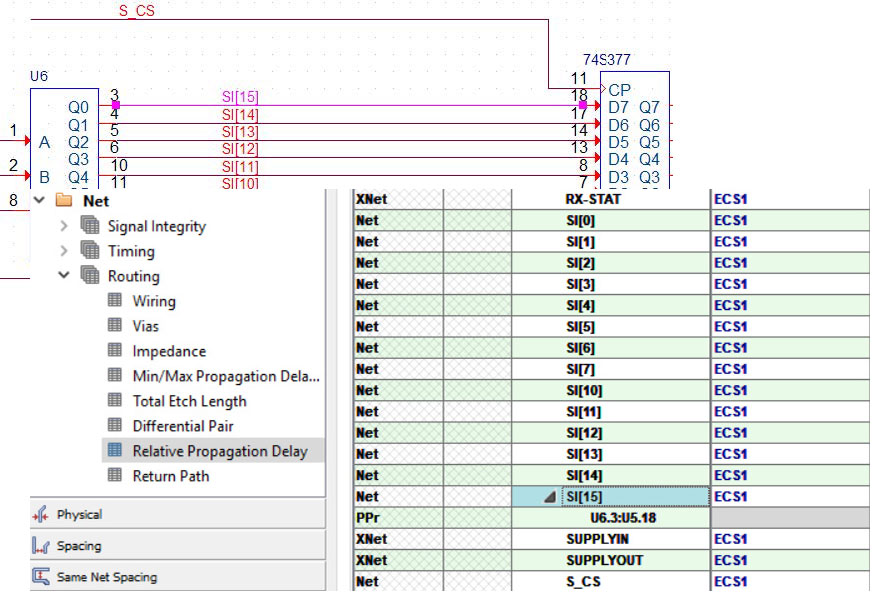
For example, Double-click the net,Q2in the Electrical CSet tab.
TheQ2net is selected in the schematic and in the Constraint Manager window.

Cross-Probing of Design Objects
You can use the cross-probing feature to navigate between the schematic nets and the net entries in Constraint Manager.
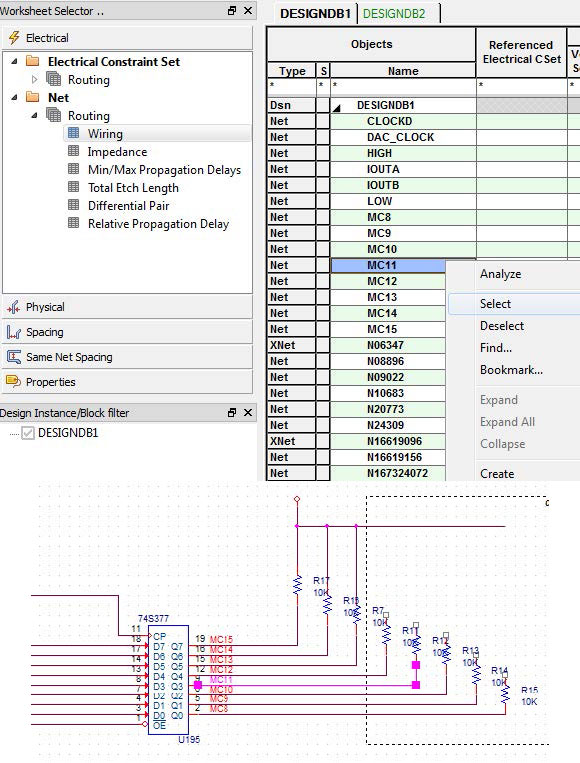
- Select a net in the schematic design, the corresponding net name is highlighted in Constraint Manager.

- Select a net name in Constraint Manager. Right-click this net name and choose Select. The corresponding net is highlighted in the schematic design.
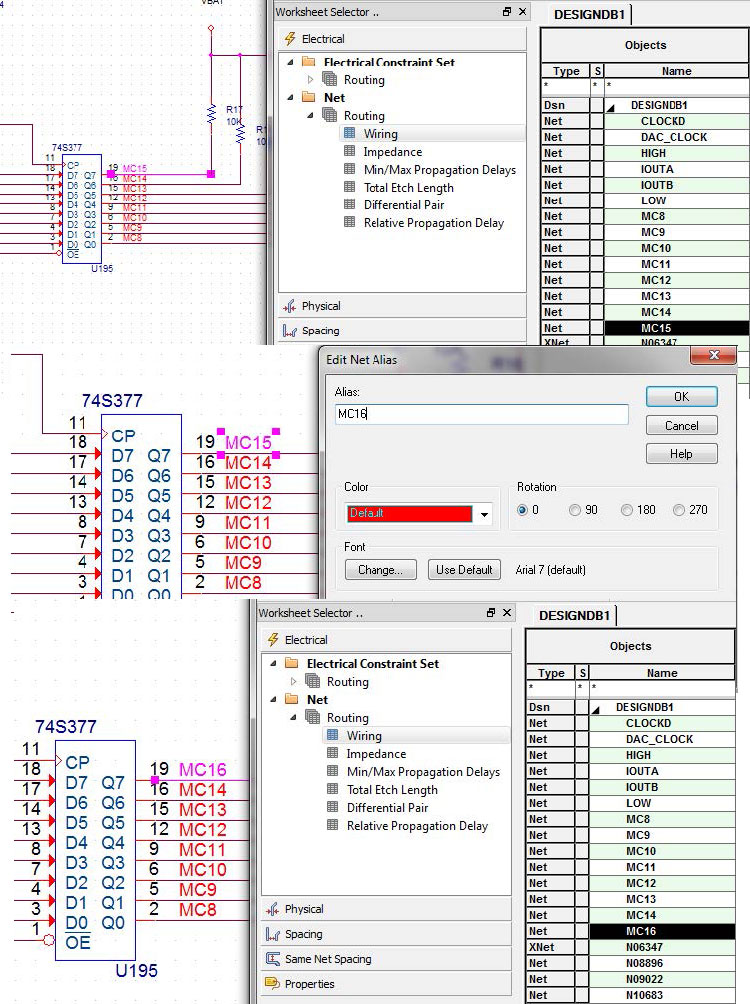
Renaming Net
If you change the net name in the schematic, you can see the corresponding change in Constraint Manager.
Modifying Voltage for Nets
After you enable Constraint Manager, to modify voltage values for nets, do the following:
- In the Constraint Manager window, select the Properties selector bar.
- Select Net – General Properties.
- View or modify the values in the Voltage column in the worksheet.

View the next document: 05 - Working with Constraint Objects.
If you have any questions or comments about the OrCAD X platform, click on the link below.
Contact Us