How to Generate a Netlist in OrCAD X
Key Takeaways
-
OrCAD X Setup: Ensure OrCAD X Capture Design is open and parts are added to the schematic pages.
-
Design Sync Setup: Configure design sync and select OrCAD X Presto as the layout tool.
-
Netlist Creation: Create a new layout, set up the PCB layout folder, and name the board.
A netlist is a textual representation of a circuit in a list that has all components and their associated electrical connections. It is often used for design verification, physical layout, manufacturing, and testing, ensuring the circuit behaves as intended and is accurately implemented on a PCB. Read on to learn how to generate a netlist in OrCAD X.
Basic Netlist Creation Processes
|
Step |
Description |
Action |
|
1 |
Open OrCAD X Capture Design |
Ensure that your OrCAD X capture design is open. |
|
2 |
Add Parts to Pages |
Add parts to different pages of your schematic (e.g., power page, micro page, peripherals page). |
|
3 |
Open PCB Menu |
Go to the PCB menu at the top of the OrCAD X interface. |
|
4 |
Select Design Sync Setup |
From the PCB menu, select "Design Sync Setup." |
|
5 |
Choose Layout Tool |
In the Design Sync Setup, select OrCAD X Presto from the dropdown menu for the layout tool. |
|
6 |
Confirm Settings |
Leave other settings as default and press OK. |
|
7 |
Create New Layout |
Return to the PCB menu and select "New Layout." |
|
8 |
Set PCB Layout Folder |
If needed, change the PCB layout folder or leave it as the default subfolder within your OrCAD project directory. |
|
9 |
Name the Board |
Set a name for the board (e.g., howto.brd) and press OK. |
|
10 |
Verify Netlist Creation |
If any netlisting errors occur, address them. OrCAD X should automatically launch OrCAD X Presto with an empty design. |
|
11 |
Check Properties Panel |
Verify netlist completion by checking the properties panel for unplaced components. |
How to Generate a Netlist and Layout in OrCAD X Presto PCB Editor
Begin by starting with your schematic. The basics of setting up a design involve preparing it to be netlisted into Presto PCB Editor.
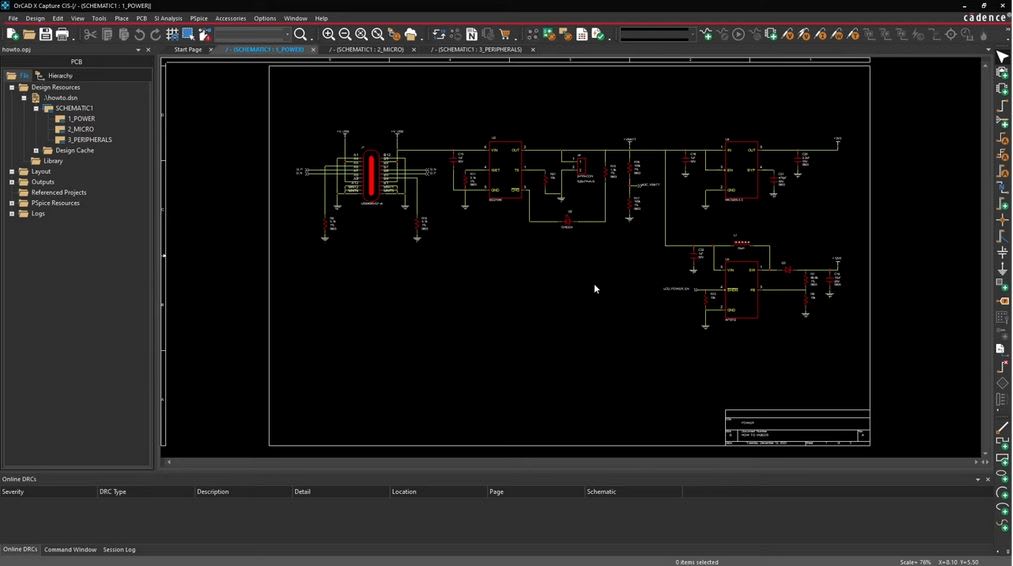
Start creating a netlist once you have a completed schematic
To netlist your design, select PCB > "Design Sync Setup" option.
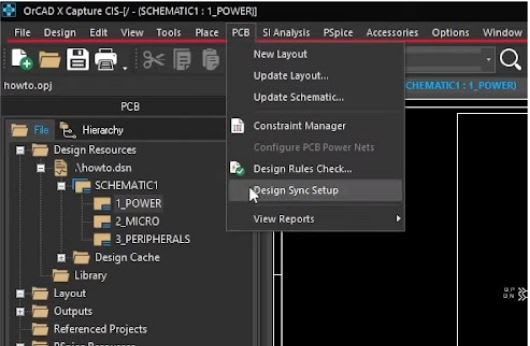
Through the PCB menu, you can set up your design sync and create a new PCB layout
Look for the "Select Layout Tool" option, which should be set to PCB Editor by default. Change this setting to OrCAD X Presto. This ensures that when you netlist or start a new layout, the OrCAD X capture design automatically opens in OrCAD X Presto PCB Editor.
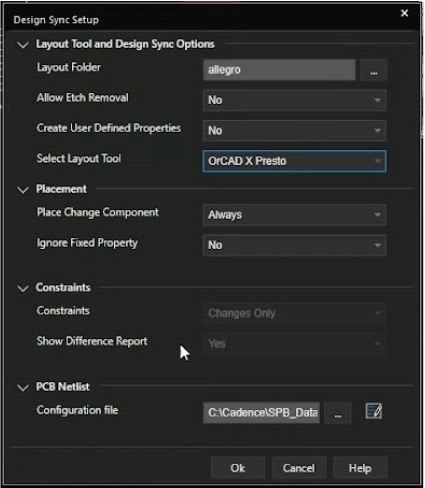
OrCAD X PCB Design Sync Setup Panel
Then press OK. Now we netlist the design. Go to the PCB menu and select "New Layout."
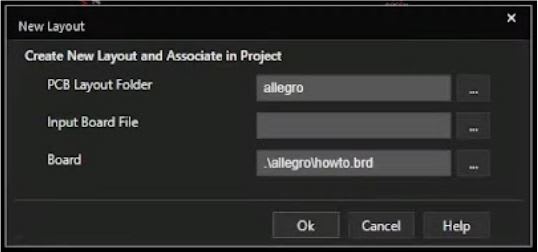
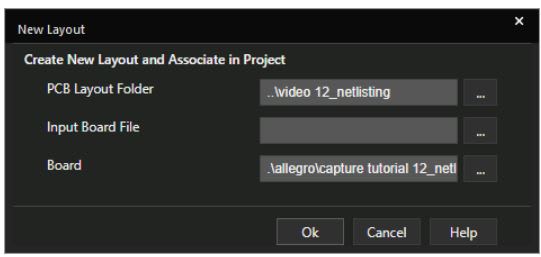
OrCAD X New Layout Panel
Change the PCB layout folder if needed; this is a subfolder within your OrCAD X project directory. Since this is a new design, leave the input board file empty. Then, set a name for your board. OrCAD X Presto PCB Editor will open and display any netlist errors that occur.

After creating a netlist by selecting PCB > new layout, this window will show any errors
OrCAD X will automatically launch OrCAD X Presto PCB Editor. The easiest way to verify that the netlist exists is to check the properties panel on the right.
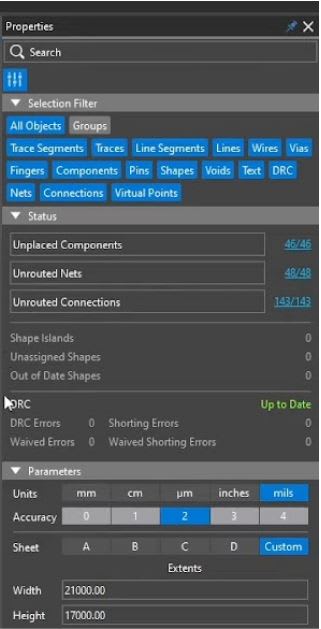
OrCAD X Properties Panel shows unplaced components
Notice that it says "Status: Unplaced Components," with a list of components. This will then populate the search panel at the bottom. By scrolling through, you'll see that these are the components of the design.
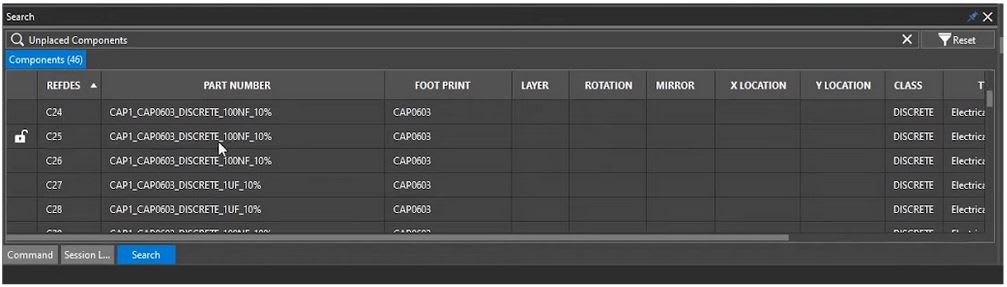
Unplaced components shown in the OrCAD X search panel
Because the designs are linked, any changes made to the schematic are automatically pushed to the layout.
Creating Only a Netlist Without a Board Schematic
In case you’d like to create just a netlist without a board layout, we’ve summarized the steps from this tutorial.
To create only a netlist, select "Tools" > "Create Netlist" from the menu.
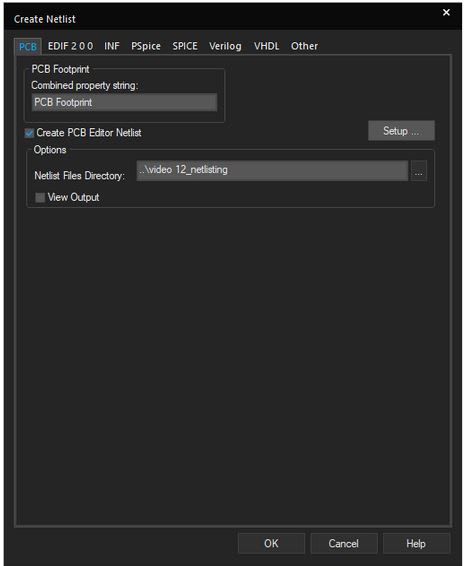
OrCAD X create netlist panel
With the "PCB" tab selected, check the option "Create PCB Editor Netlist." Browse to the location where you want to save the netlist.
New Layout panel
If this is your first time netlisting, select "Setup." Browse to the location of the allegro.cfg file. Click "OK" to close the setup window. Finally, click "OK" to netlist the design.
Syncing Changes Between Schematic and Layout
Syncing From Schematic to Layout
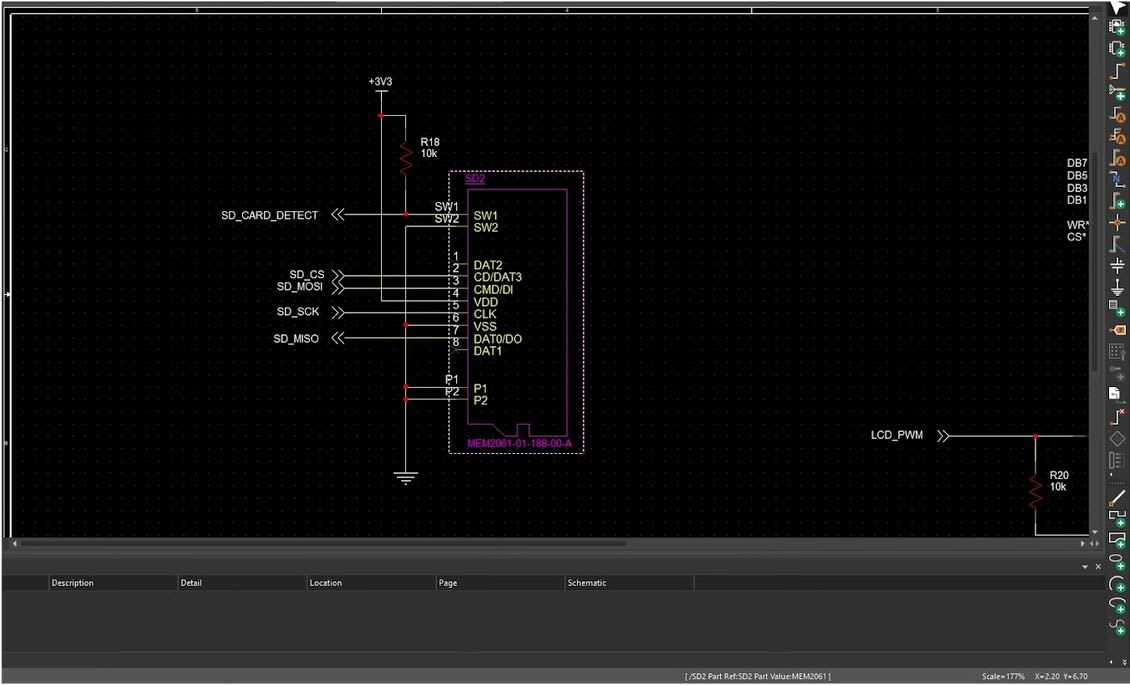
In OrCAD X Capture, suppose we rename SD4 to SD1.

Renamed component SD1 in OrCAD Capture
Select "PCB" > "Update Layout" to update the layout.
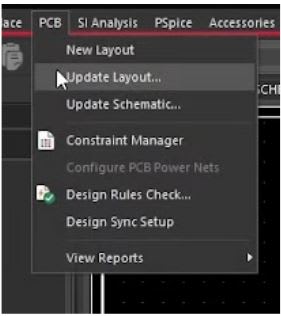
Selecting “Update Layout”

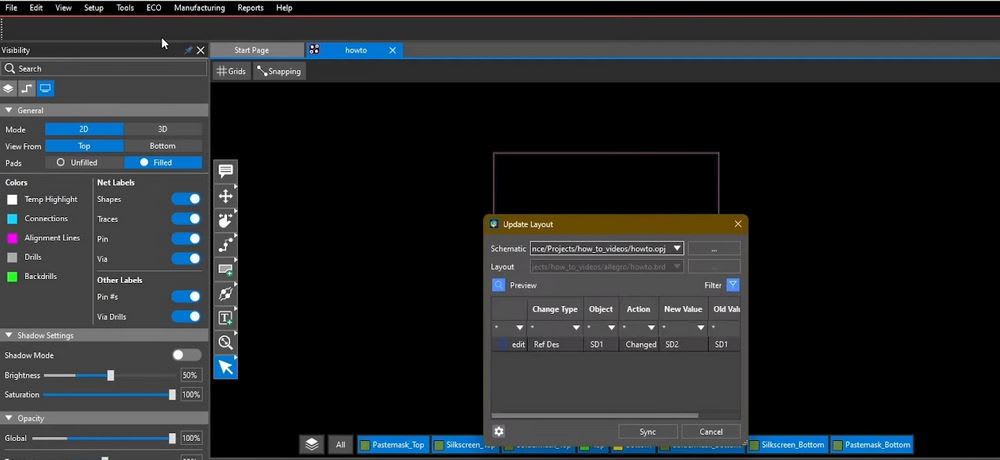
Update Layout panel in OrCAD X
You don't need to close OrCAD X Presto PCB Editor; it can be left open. Then, press "Sync," and if you jump back to your layout, you'll see the changes made.
Syncing From Layout to Schematic
You can do the same from the layout tool. Go into "ECO" > "Update PCB." The same pop-up will appear, and you'll be able to transfer layout changes to the schematic.
Select "ECO" > "Update PCB” to update the layout
Cross Probe Between Schematic and Layout
Drag and drop a component from the search panel to the design to place an object in the layout.
By selecting an object in the layout, it will also be selected in the schematic.

Selected component in OrCAD X Presto layout environment
Selected component in OrCAD X Capture
This also works in the opposite way; if you right-click and select "Cross Probe" in the schematic, the corresponding object will be highlighted in the layout. Now that you have the step-by-step guide on how to generate a netlist in OrCAD, try this out for yourself! Experience the power of OrCAD X firsthand today.
Leading electronics providers rely on Cadence products to optimize power, space, and energy needs for a wide variety of market applications. To learn more about our innovative solutions, talk to our team of experts or subscribe to our YouTube channel.