OrCAD X OnCloud Dashboard
The OrCAD X platform offers a cloud-based dashboard for sharing and analyzing design data. You can use the OrCAD X OnCloud dashboard to share data via workspaces and analyze data via cloud-based schematic and PCB viewers. The cloud dashboards can be accessed using commonly available browsers such as Chrome, Edge, Firefox. It is available to all registered OrCAD X users.
Overview of OrCAD X OnCloud Dashboard Interface
The OrCAD X OnCloud dashboard allows you to quickly access the shared workspaces. It provides menus and features for effectively managing projects in workspaces.
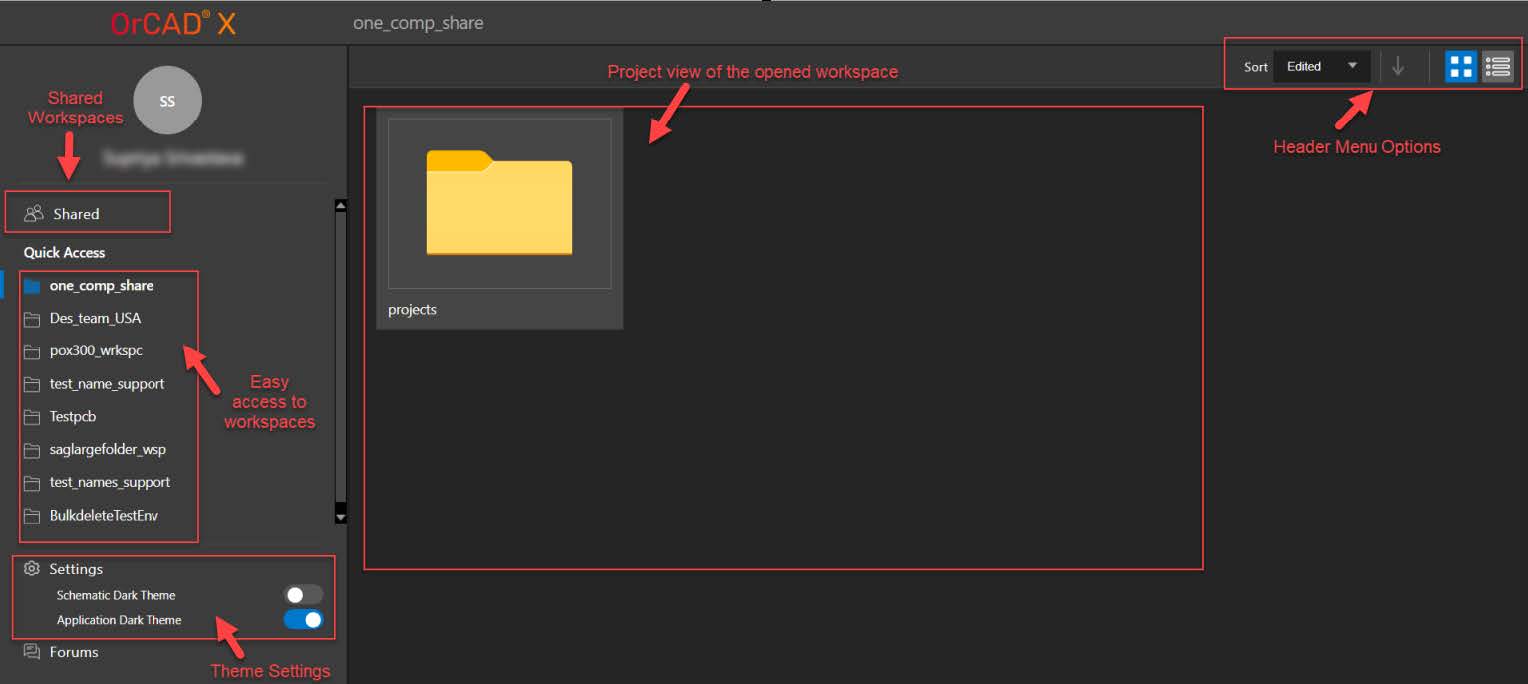
You find the following panels and sections in the OrCAD X OnCloud dashboard interface:
| Panel | Access | Description |
|---|---|---|
| Shared |
Click the Shared button on the top left side of the dashboard. |
A list of workspaces you have shared, along with the ones shared with you.
|
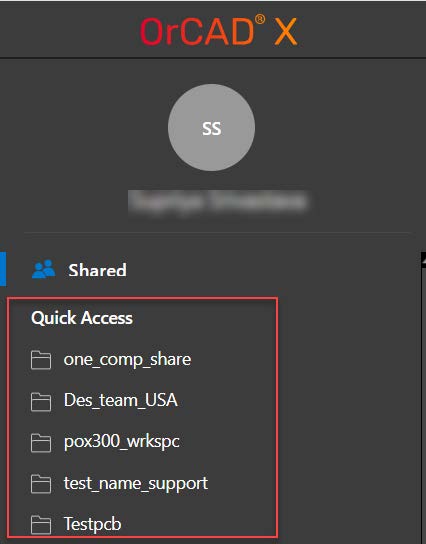
| Quick Access |
Choose from the list of shared workspaces. |
Includes shared workspaces to which the administrator or a designer has granted you access.
|
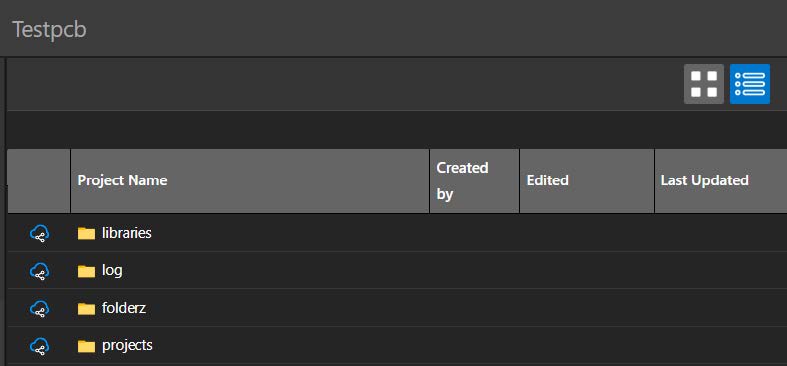
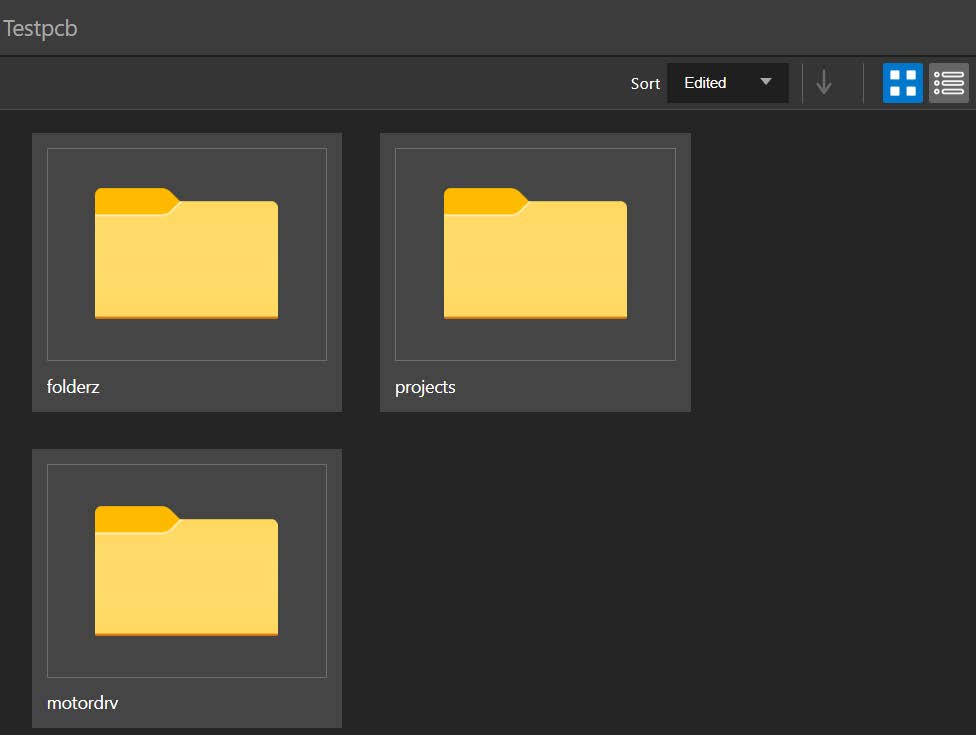
| Project Manager |
Select a workspace to view the project details. |
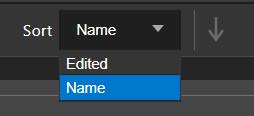
Displays and organizes all the resources used in a project throughout the design flow. It provides the following tabs to view the projects: Grid View
Card View
Name-based sorting
|
| Settings |
Click the toggle buttons to select either dark or light themes. |
Sets the background color of your schematic sheets and the application to either dark or light.
|
| Forums |
Click the Forums button in the below left corner of the dashboard. |
Browse the OrCAD X community forum to learn more.
|
Reviewing Schematic Designs using Cloud-Based OrCAD X Schematic Viewer
OrCAD X Schematic Viewer is a cloud-based viewer utility available to all registered OrCAD X users. It enables you to review schematic designs in .DSN format shared using OrCAD X Dashboard, directly through a web browser with no software installation required. From the Project Manager, you can open the project in the schematic view and perform canvas-based operations such as zooming in, zooming out, scrolling, highlighting, and more.
You need to perform the following steps:
-
Open the Cadence OnCloud Dashboard in a web browser.
-
Log in using the credentials specified during registration.
The OrCAD X dashboard opens, displaying all the shared workspaces.
-
Select a workspace under the Shared section. This section lists workspaces you have shared and those shared with you. All the folders present inside a project are displayed.
-
Navigate through the folders to locate your project.
-
Double-click a folder to open it and view its content.
All the projects present inside that folder are displayed. You can sort and display icons to find a project.
-
Locate and double-click the desired project folder.
The project files and the associated folders are displayed.
Use breadcrumbs at the top to navigate between folders and projects. -
Double-click to open the folder and find a
.DSNor.opjfile. The schematic design files associated with the project are displayed. -
Double-click the schematic design file card to open a
.DSNoropjfile.Alternatively, expand the ellipsis (...) menu, located at the right-bottom-corner of the card and select Open.
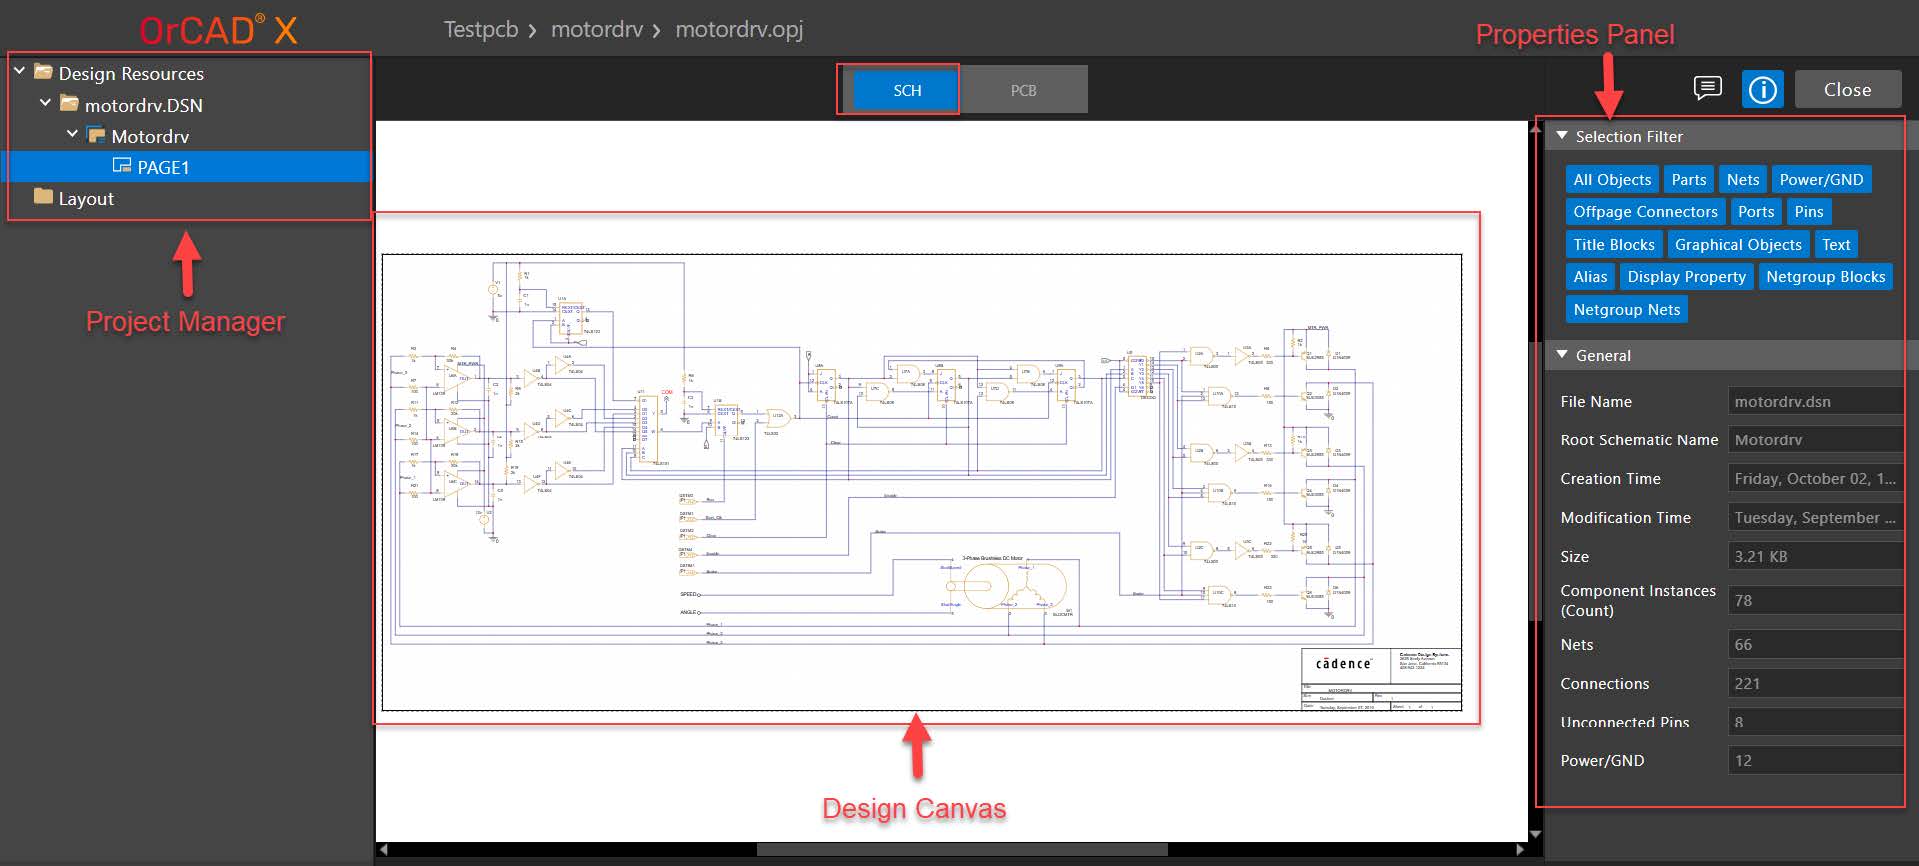
The layout viewer opens under the SCHtab. The user interface includes:
-
Project Manager: Displays and organizes all the resources used in a project throughout the design flow.
-
Properties Panel: View selection filters, design summary, or object properties and attributes in a read-only mode.
-
Command Icons: Options for toggle markup visibility, properties icon, and closing the viewer.
-
Design Canvas: View and navigate within design in read-only mode.
The following image displays the user interface of the OrCAD X schematic viewer:
- To add a comment using the Toggle Markup Visibility icon, choose the Review option in the Markup menu. The Markup dialog box appears.
-
If the design already has comments, the panel displays prepopulated review comments from previous sessions.
-
Click the New Comment button. A new comment card opens at the top, and existing comments are listed below.
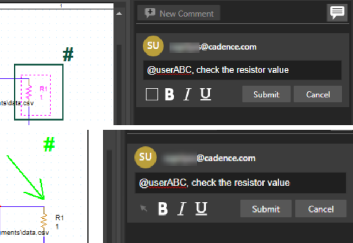
The comment card displays the user name, user avatar, text field, markup tools, text formatting buttons, and options to save or discard a comment. Comment text can be formatted using rich text features such as bold, italic, and underline.
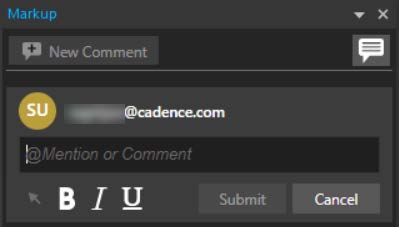
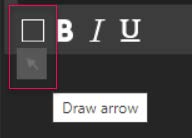
It also contains a markup tool that allows you to mark any area in the design canvas using a rectangle or arrow. This tool is a graphical annotation in the design canvas, highlighting the areas where comments are added.

-
Select the markup tool in the comment card to draw a rectangle to mark a rectangular-shaped area or an arrow to point to an object in the design canvas.
-
Enter the comment in the text field, and press Submit.
Once the comment is submitted, the markup data displays the information such as a unique comment ID, a timestamp displaying the local time zone, and a snapshot of the design (
.dsn).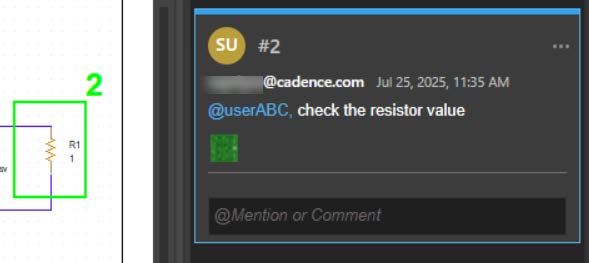
-
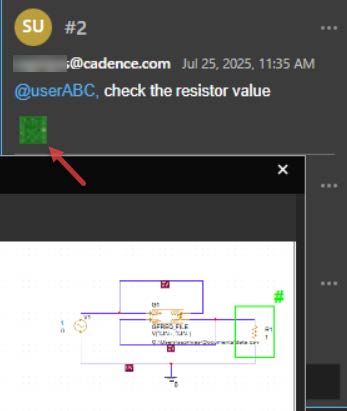
You can zoom in the snapshot and see the information of the design.
-
To respond to a comment, click the text field and add your reply.
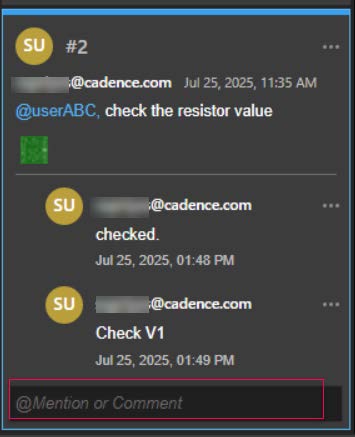
Even if the comments are in sync with the design, the design changes can go out of sync. To sync the design changes with the published comments, you need to manually sync the latest changes from the shared workspace to your local workspace ( My Workspace).
-
You can also disable the markup visibility by clicking the Toggle Markup Visibility icon.

The highlighted markups are disabled in the design canvas.
-
To modify a review comment and markup, select a comment and click the More Options icon to choose options to edit, delete, or resolve a comment.
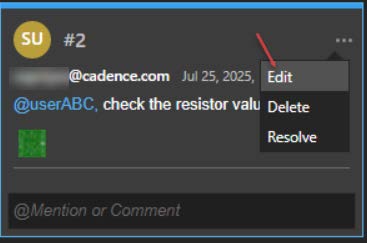
-
To edit a comment, select an appropriate icon to save or discard the comment.
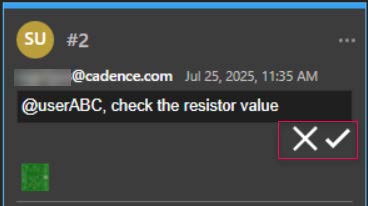
-
To delete a comment, click the Delete button.
-
To resolve a comment, click Resolve to close an open comment.
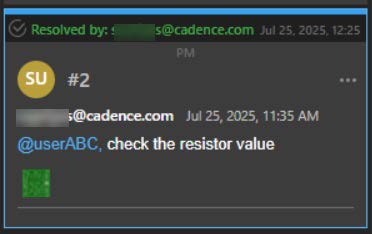
A reply can be added when marking it resolved, The resolved comment displays the status and the user name who resolved it. A comment, when resolved, removes its markup from the canvas.
-
You can also reopen a resolved comment. To do this, click Reopen.
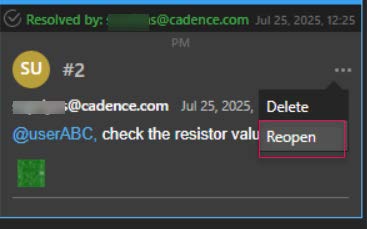
-
The markup is restored in the design canvas.
Reviewing Layout Designs using Cloud-Based OrCAD X Layout Viewer
External reviewers must register on the Cadence Community website to access this OrCAD X Layout viewer.
OrCAD X Layout Viewer is a cloud-based viewer utility available to all registered users of OrCAD X. This viewer allows users to review layout designs in the .brd format shared using OrCAD X Dashboard. This viewer is intuitive and accessible on any device.
-
Open the Cadence OnCloud Dashboard in a web browser.
-
Log in using the credentials specified during registration.
The OrCAD X dashboard opens, displaying all the shared workspaces.
-
Select a workspace under the Shared section.
All the folders present inside a project are displayed.
-
Navigate through the folders to locate your project.
-
Double-click a folder to open it and view its content.
All the projects present inside that folder are displayed. Sorting and displaying icons can be used to find a project.
-
Locate and double-click the desired project folder.
The project files and the associated folders are displayed.
-
Double-click to open the Allegro folder to find a
.brdfile.Use breadcrumbs at the top to navigate between folders and projects.
The layout design files associated with the project are displayed.
-
Double-click the layout design file card to open a
.brdfile.When you have a schematic viewer open in the SCH tab, clicking the PCB tab opens the associated layout design in the PCB viewer.
Alternatively, expand the ellipsis (...) menu located at the bottom right corner of the card and select Open.
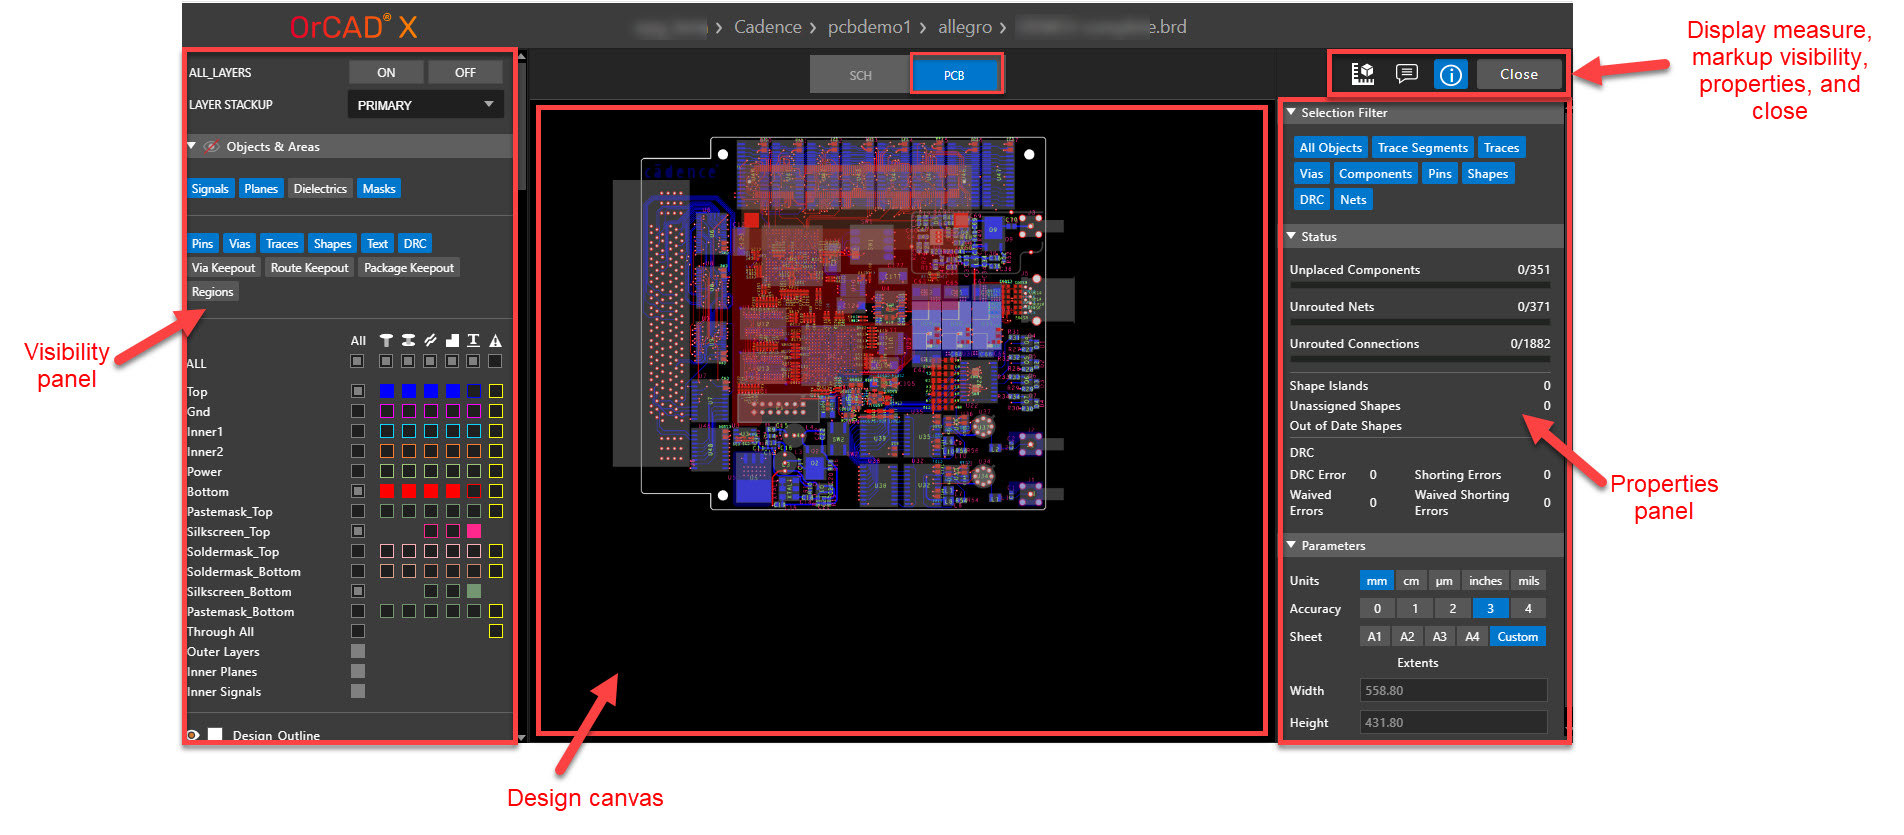
The layout viewer opens under the PCB tab. The user interface includes:
-
Visibility Panel: Toggle visibility of design layers and objects globally and individually.
-
Properties Panel: View selection filters, design summary, or properties and attributes of the selected objects, such as components, nets, pins, shapes, traces, vias, and DRCs in a read-only mode.
-
Command Icons: Options for measuring distances, adding markup and review comments, and closing the viewer.
-
Design Canvas: View and navigate within the design. Selecting an object highlights it in the design canvas.
The following image displays the user interface of the OrCAD X Layout viewer:
-
-
Press and hold the
CtrlorShiftkey while scrolling the mouse wheel to zoom and pan within the design canvas. -
Click the Measure icon, set the Selection Filter, and select two objects in the design canvas.
The Measure panel displays the names, layers, and the minimum distance between the selected objects in design units.
-
Click the Toggle Markup Visibility icon at the top to display all markups and comments added by users who with access to the design.
-
Do the following to add a comment:
-
Click the New Comment button to open a new markup dialog.
-
Choose a markup type and draw it in the design canvas over the relevant object.
-
Add a comment and the user ID of the reviewer.
-
Click Submit to save the markup and comment, indicating that attention is required.
-
-
Do the following to respond to a comment:
-
Select an existing comment to respond to.
-
Use the ellipses (...) menu to choose Resolve, Edit, or Delete.
-
Add a reply to the selected comment.
If the same layout design file (.brd) exists in the local disk, review comments can also be viewed in real time within the OrCAD X PCB Layout desktop environment.Resolving a comment automatically removes its associated markup in the design canvas.
-
-
-
Click the Close button in the top-right corner to exit the layout viewer.
Sharing PCB Design File URLs
OrCAD X OnCloud dashboard supports workspace-enabled web sharing of PCB design files for all registered OrCAD X users. Instead of sharing the entire workspace, you can share links to individual files with other users directly from My Workspace. The user can view the design and collaborate with you by providing feedback and markups.
To share a design file, perform the following steps:
-
Log in to the Cadence OnCloud dashboard.
-
Select the workspace that contains the design file you want to share.
-
Double-click to open the folder.
-
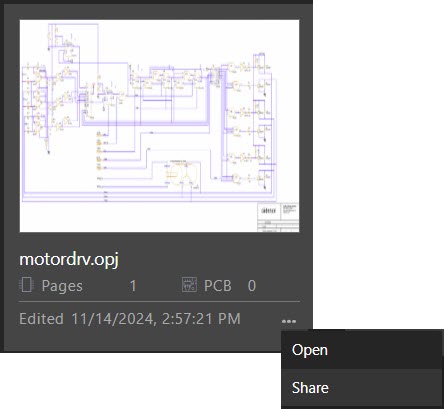
Click the ellipsis (...) menu at the lower end of the file and choose Share.
-
A pop-up is displayed where you can enter the user's email IDs and click Enter.
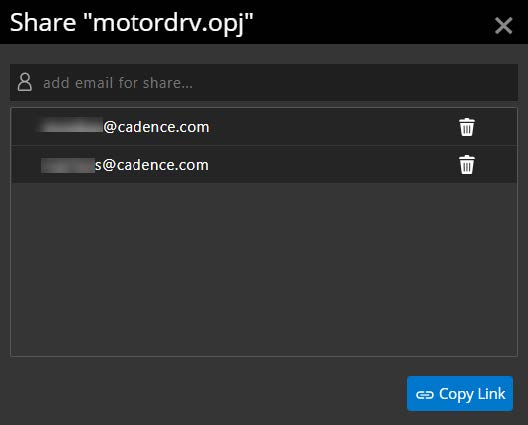 Ensure that the user has access to the workspace.
 -
Select a user and click the Copy Link button to generate a share link for the selected user who can review the schematic design.
The user can access the design on web, review the design and add markup, as required.

